
[ad_1]
Have you ever taken photos that turned out less sharp than you hoped for? Even with a perfect technique and the right setup you might get frustrated that you can’t avoid soft images that seem almost out of focus.
There are many reasons that an image might be a bit blurry, from focus issues to a shutter speed that is too slow. I will cover these as well, however, the main focus of this guide is going to be talking about a specific cause of soft images known as heat haze. Heat haze is also known as heat distortion or heat blur.
As a full time professional photographer heat haze is an issue I am very familiar with. It is particularly an issue for me when shooting distant wildlife with a long lens. In fact shooting with a long lens is often when heat haze becomes more obvious in your photos.
However heat haze can affect all kinds of photography including landscape photography and astrophotography.
In this guide, I’m going to talk about what heat haze is, how it affects your photos, and what you can do to avoid soft images as a result of heat haze. I’m also going to offer a solution to fixing images that you have which are affected by heat haze.
First though, let’s talk about some of the different reasons that an image might not to be as sharp as you would like, so you can understand if the issue you are facing is heat haze or something else.
What Causes Photographs Not to Be Sharp?
There are a number of reasons your images might not be sharp. Whilst one of these is heat haze, there are a number of others to be aware of.
Understanding the reasons that cause an image not to be sharp is important so you can troubleshoot your photos and understand what you need to change to improve them.
Here are some common reasons your images aren’t turning out sharp.
Slow shutter speed
If you shoot using a slow shutter speed this can result in blurry images. This can be for two reasons.
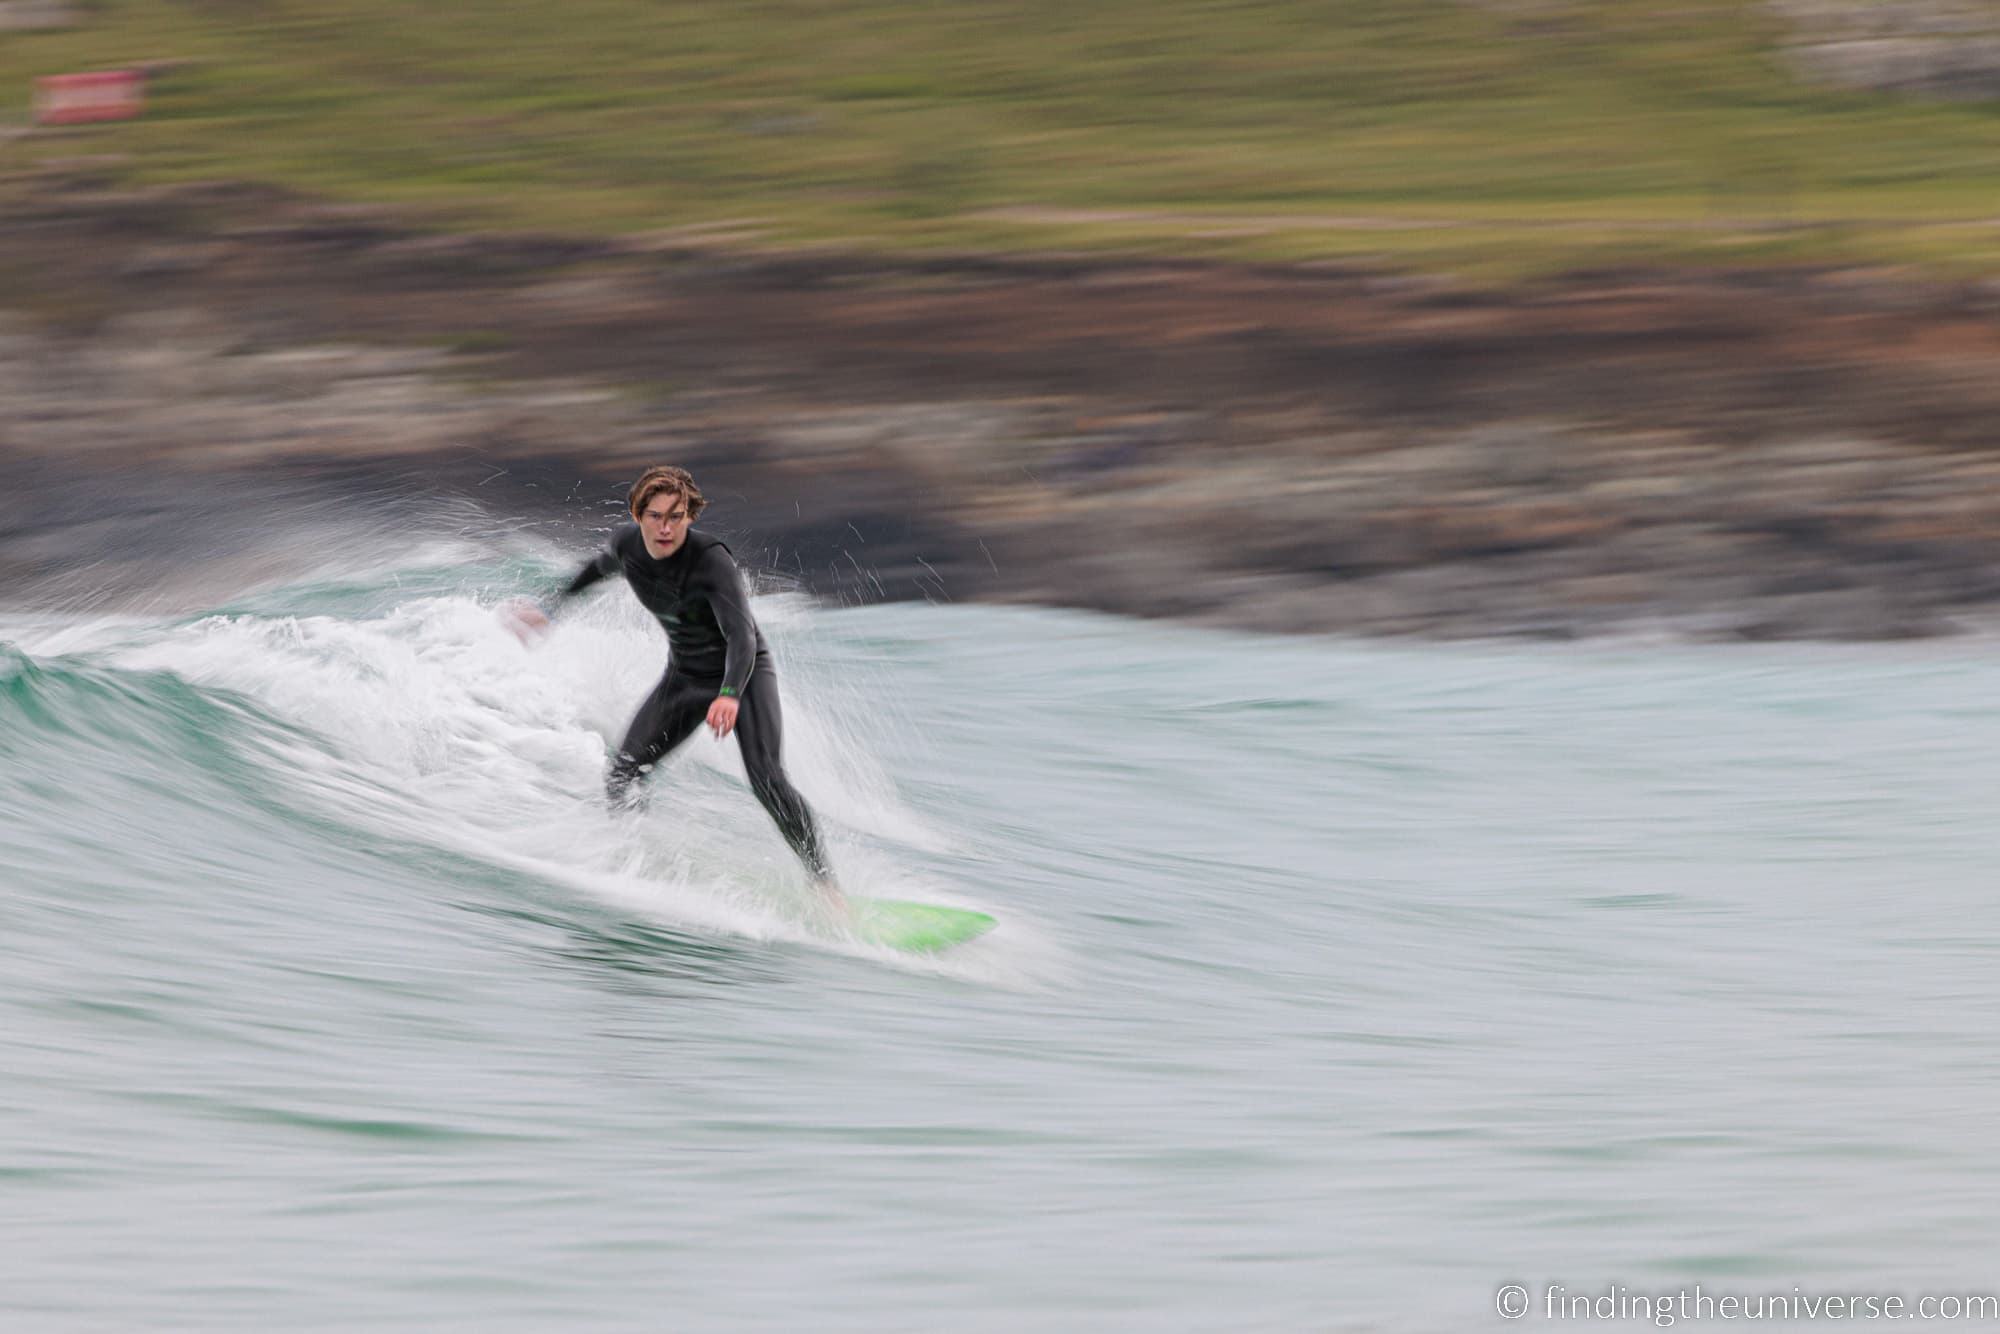
First, if your subject is in motion, then you will get motion blur as their movement while the shutter is open will appear in the image.
The amount of blur will depend on how fast the subject is moving. For example, person moving at walking pace obviously covers less ground than a person riding a motorbike for example.
As a rule of thumb, 1/60th of a second shutter speed is the slowest you would go for a person walking, and then you need to use faster and faster shutter speeds for subjects moving faster.
The other reason slow shutter speeds might result in blurry images is if you are using slow shutter speeds and hand holding your camera.
When you hold your camera in your hand, any tiny motions in your hand will be reflected in the image. Imagine trying to paint a picture whilst bouncing around in the back of a vehicle. The painting would be a blurry mess. The same is true of photography.
When thinking about what speed shutter to use when handholding your camera, the two main factors to consider are the number of megapixels and the focal length of the lens.
A higher megapixel camera is more sensitive to slow shutter speeds than a lower megapixel camera. So a hand-held 20-megapixel camera will produce sharper images at slower shutter speeds than a 50-megapixel camera, all else being equal.
If you are using a telephoto lens, the longer the focal length, the faster the shutter speed. Imagine looking through a telescope – even the smallest movements in your hand are exaggerated due to the magnification.
As a rule of thumb, your minimum shutter speed should be the inverse of the focal length. So if you are using a 50mm lens, shoot no slower than 1/50th of a second. If you are using a 400mm lens, shoot no slower than 1/400th of a second.
Aperture setting
The aperture of your lens can affect the sharpness of your image in a number of ways.
First, if you shoot with a very wide open aperture (f/1.8 – f/2.8 for example), this leads to a very shallow depth of field. This means that less of the image will be in focus, and so elements might be out of focus and blurry. The solution in this case if you want more of the scene to be sharp is to use a narrower aperture.
Aperture can also affect sharpness due to an effect called diffraction. If you shoot with a very narrow aperture (usually f/16 and narrower), then diffraction will result in softer images.
Generally, most camera lenses offer the sharpest images around f/8 – f/11, but this will vary depending on lens so do experiment with your setup.
Incorrect focus
Another reason for soft or blurry images is simply having the focus setup incorrectly. If you focus on the wrong subject, such as something in the far distance when you want a nearby object to be sharp, then you will not get the results you want.
Using the wrong focus mode can also cause focus issues. Most modern cameras have a range of focus modes depending on what you are photographing. For example, if you are shooting a moving subject like a bird in flight, you want to use a continuous focus mode that tracks the subject as it moves away or towards you, meaning when you actually press the shutter button to take the shot it is still sharp.
Learning the various focus modes on your camera and when to use them is very important, and something I cover in detail in my online photography course.
Atmospheric Haze
Atmospheric haze is different from heat haze. Atmospheric haze is caused by atmospheric particles including moisture, smoke, dust, and industrial contaminants. These scatter light, and result in images having reduced clarity.
Atmospheric haze includes fog and mist as well as smoke and pollutants. It can significantly reduce visibility and clarity in an image. Unlike heat haze though, atmospheric haze doesn’t give the same shimmering blurred effect.
Atmospheric haze is also easier to mitigate for using software tools like DxO’s ClearView feature in DxO PhotoLab, which is specifically designed to boost clarity in hazy images.
Heat Haze
Finally, heat haze! Heat haze can definitely be a reason for soft images, and we are going to cover that in detail now in the remainder in this guide.
What is Heat Haze?
Heat haze, also known as heat shimmer or heat distortion, is a natural phenomenon that is caused when light moves through air of different densities.
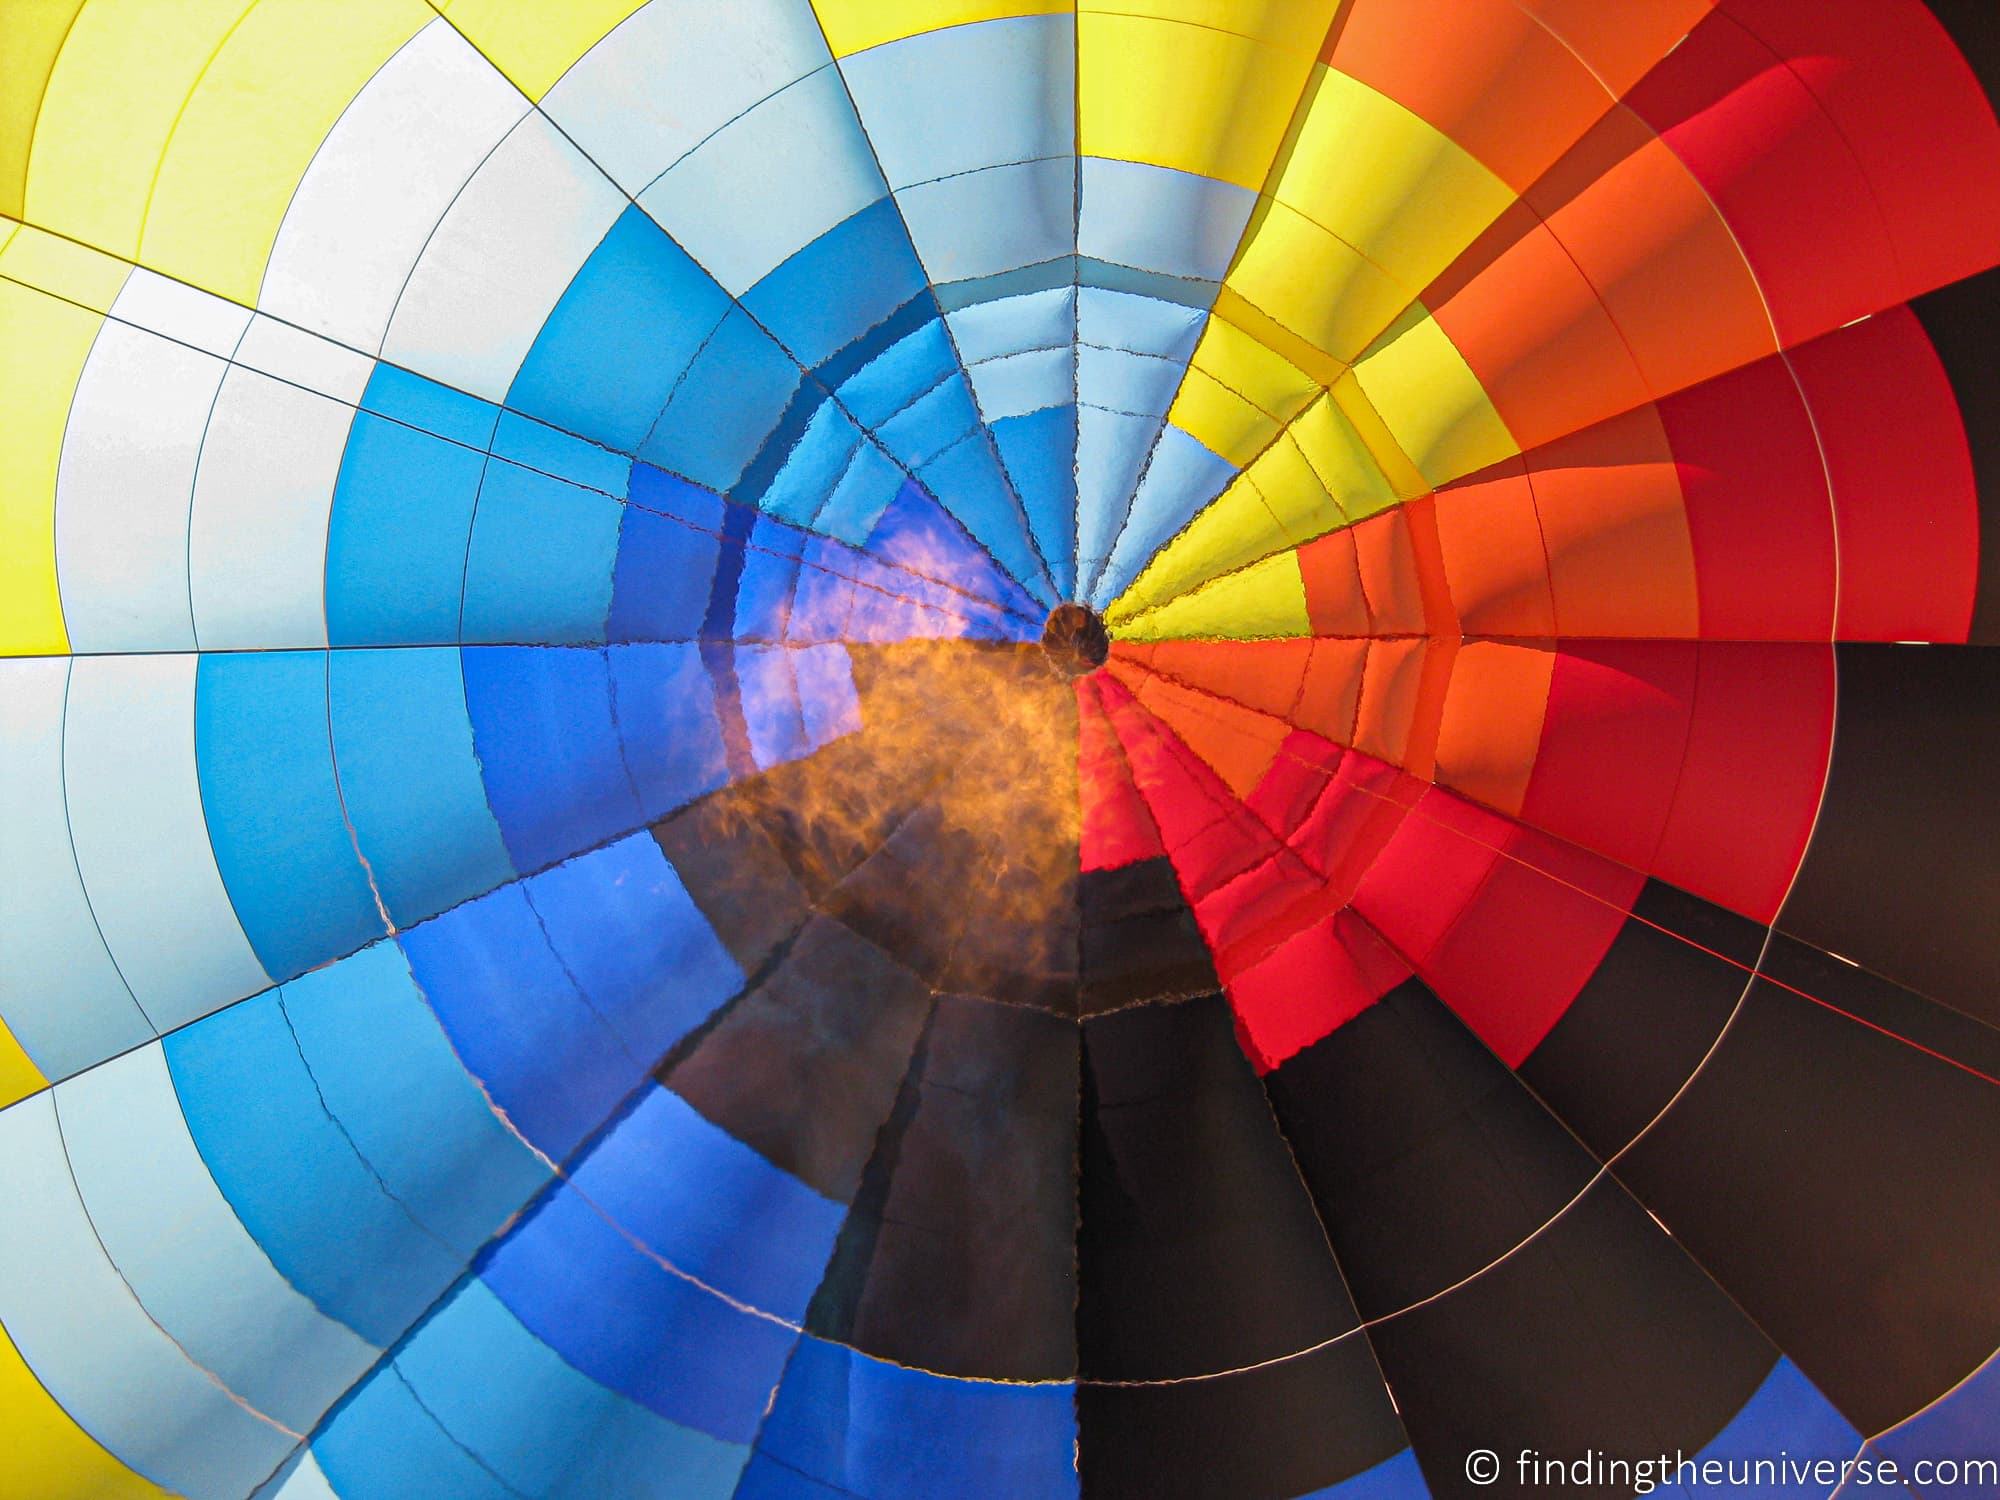
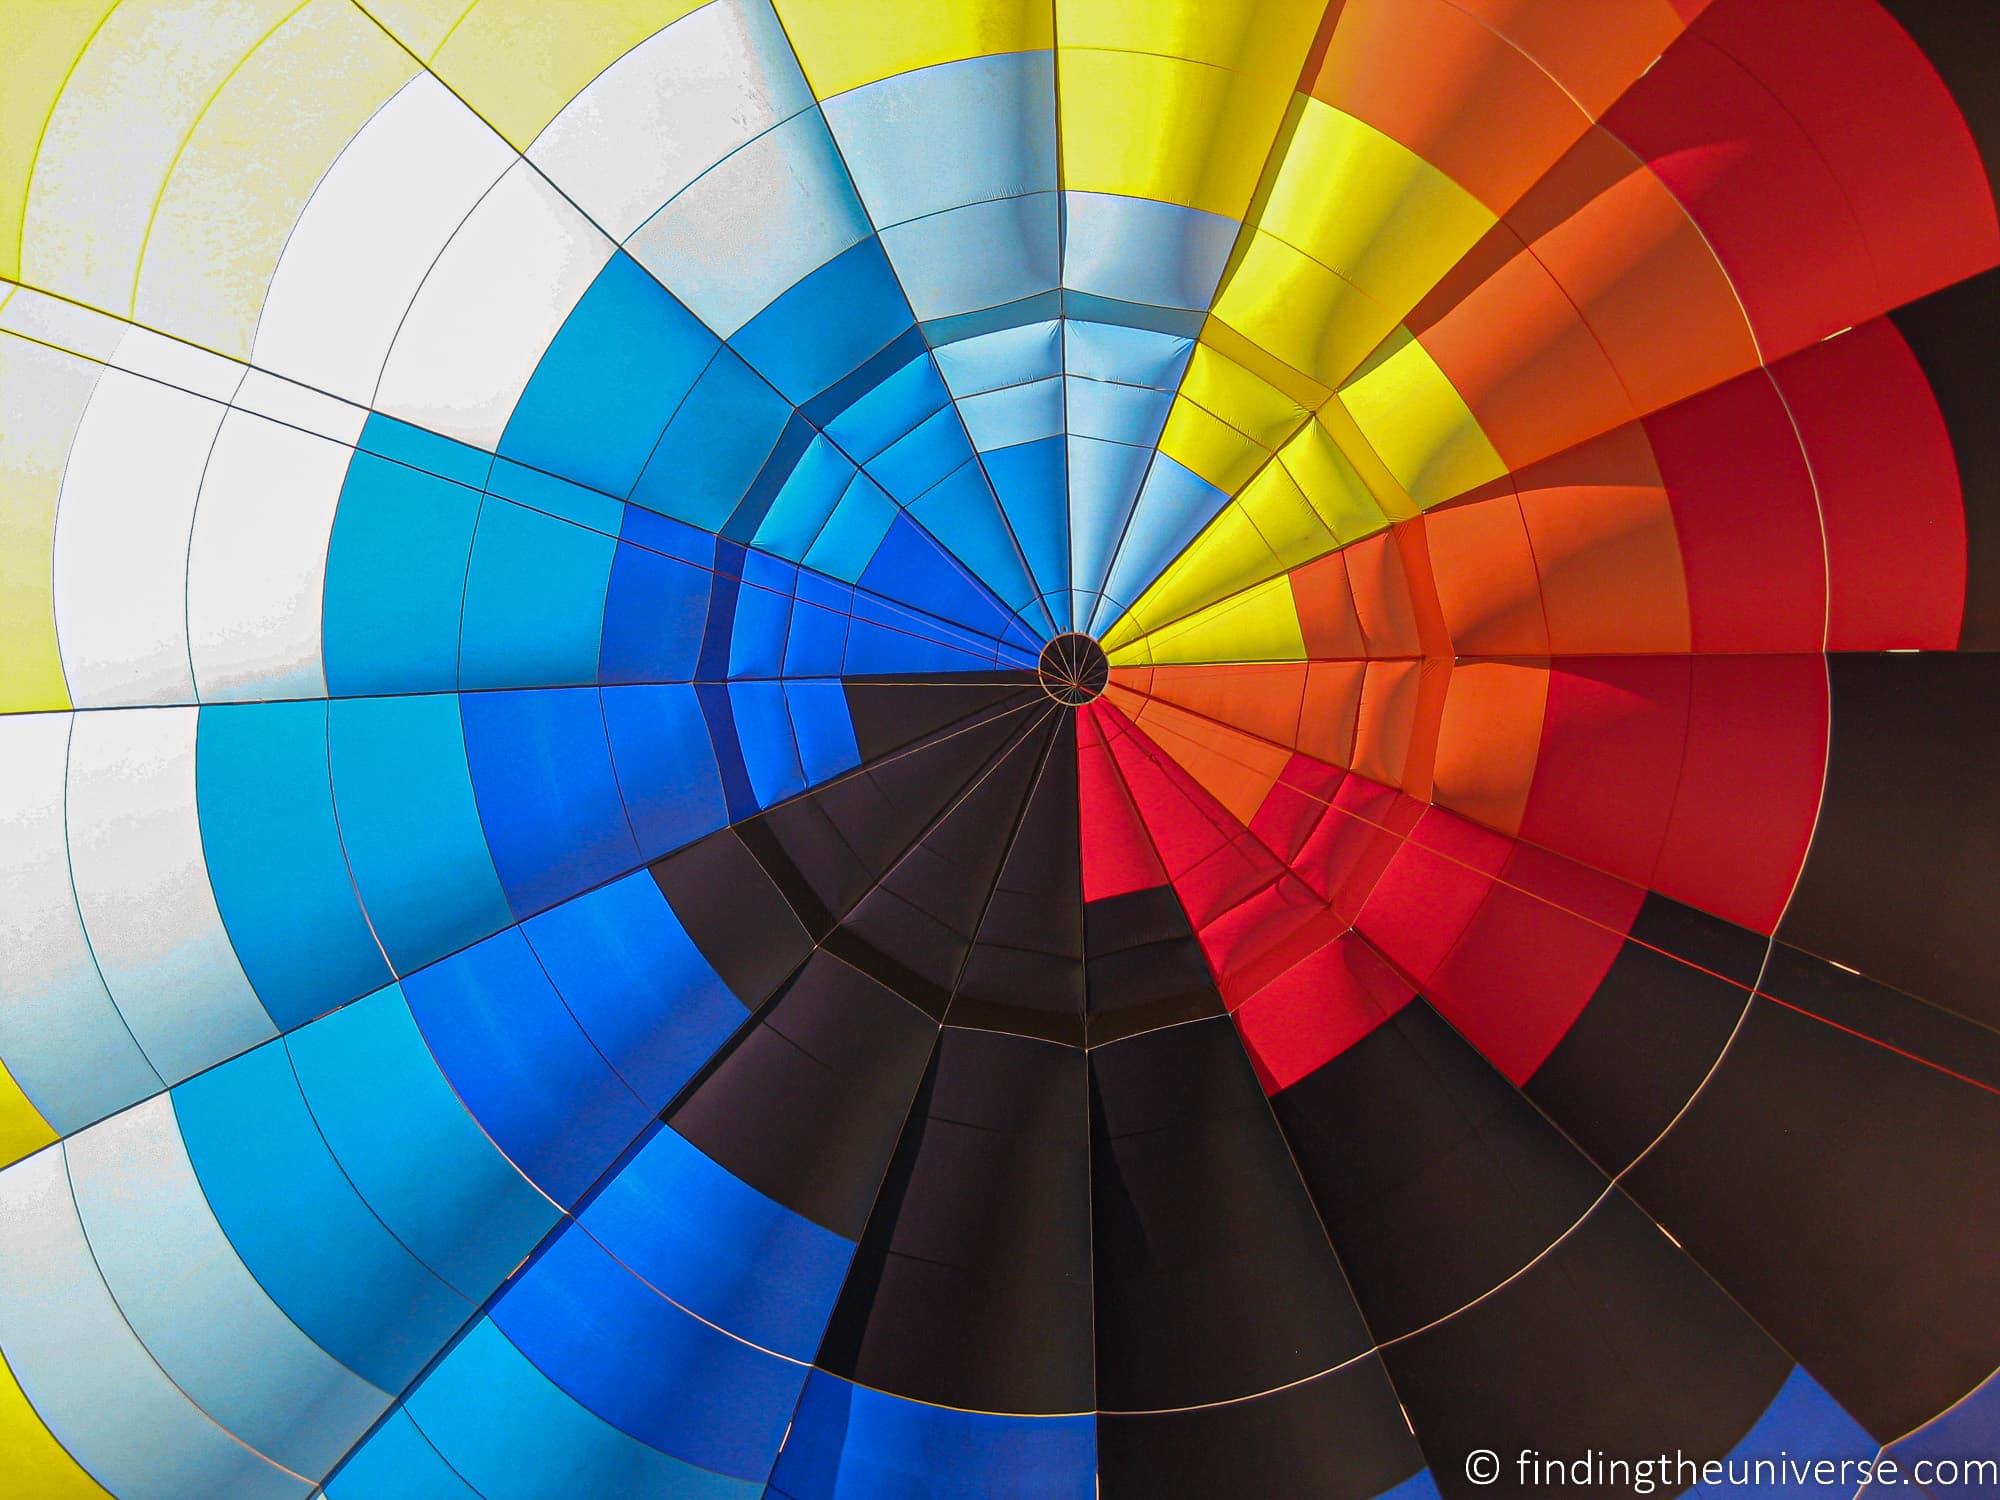
As you might be aware, hot air is lighter than cold air. This is why hot air balloons fly—the hot air in the balloon is lighter than the surrounding air, and so the balloon rises.
What you might not know is that light travels at different speeds depending on what it is travelling through. Light travels faster through the lighter hot air than it does through the denser cold air.
When you have layers of hot and cold air near each other, the light basically speeds up and slows down as it passes through different layers. This results in the light bouncing around, or refracting.
You will have seen this phenomenon in effect day to day all around you. It’s what causes stars to twinkle, and gives rise to the mirages you see above a road on a hot day. It’s also what makes the rear of jet engines look blurry – the hot air escaping refracts the light.
Heat haze becomes particularly apparent when there is a significant temperature difference between the ground and the air above it. The sun warms the ground, and the ground then warms the air above it. This hot air rises, and creates currents of warm and cold air. Light passing through this mix of hot and cold air bounces around, creating a shimmering effect.
In images, heat haze causes objects to appear fuzzy and unsharp. If straight lines look wiggly in the photo, as with my balloon example above, that is a good example of heat haze. Take a look at this image of a vehicle as an example, shot in the middle of the day in Kidepo National Park, Uganda.
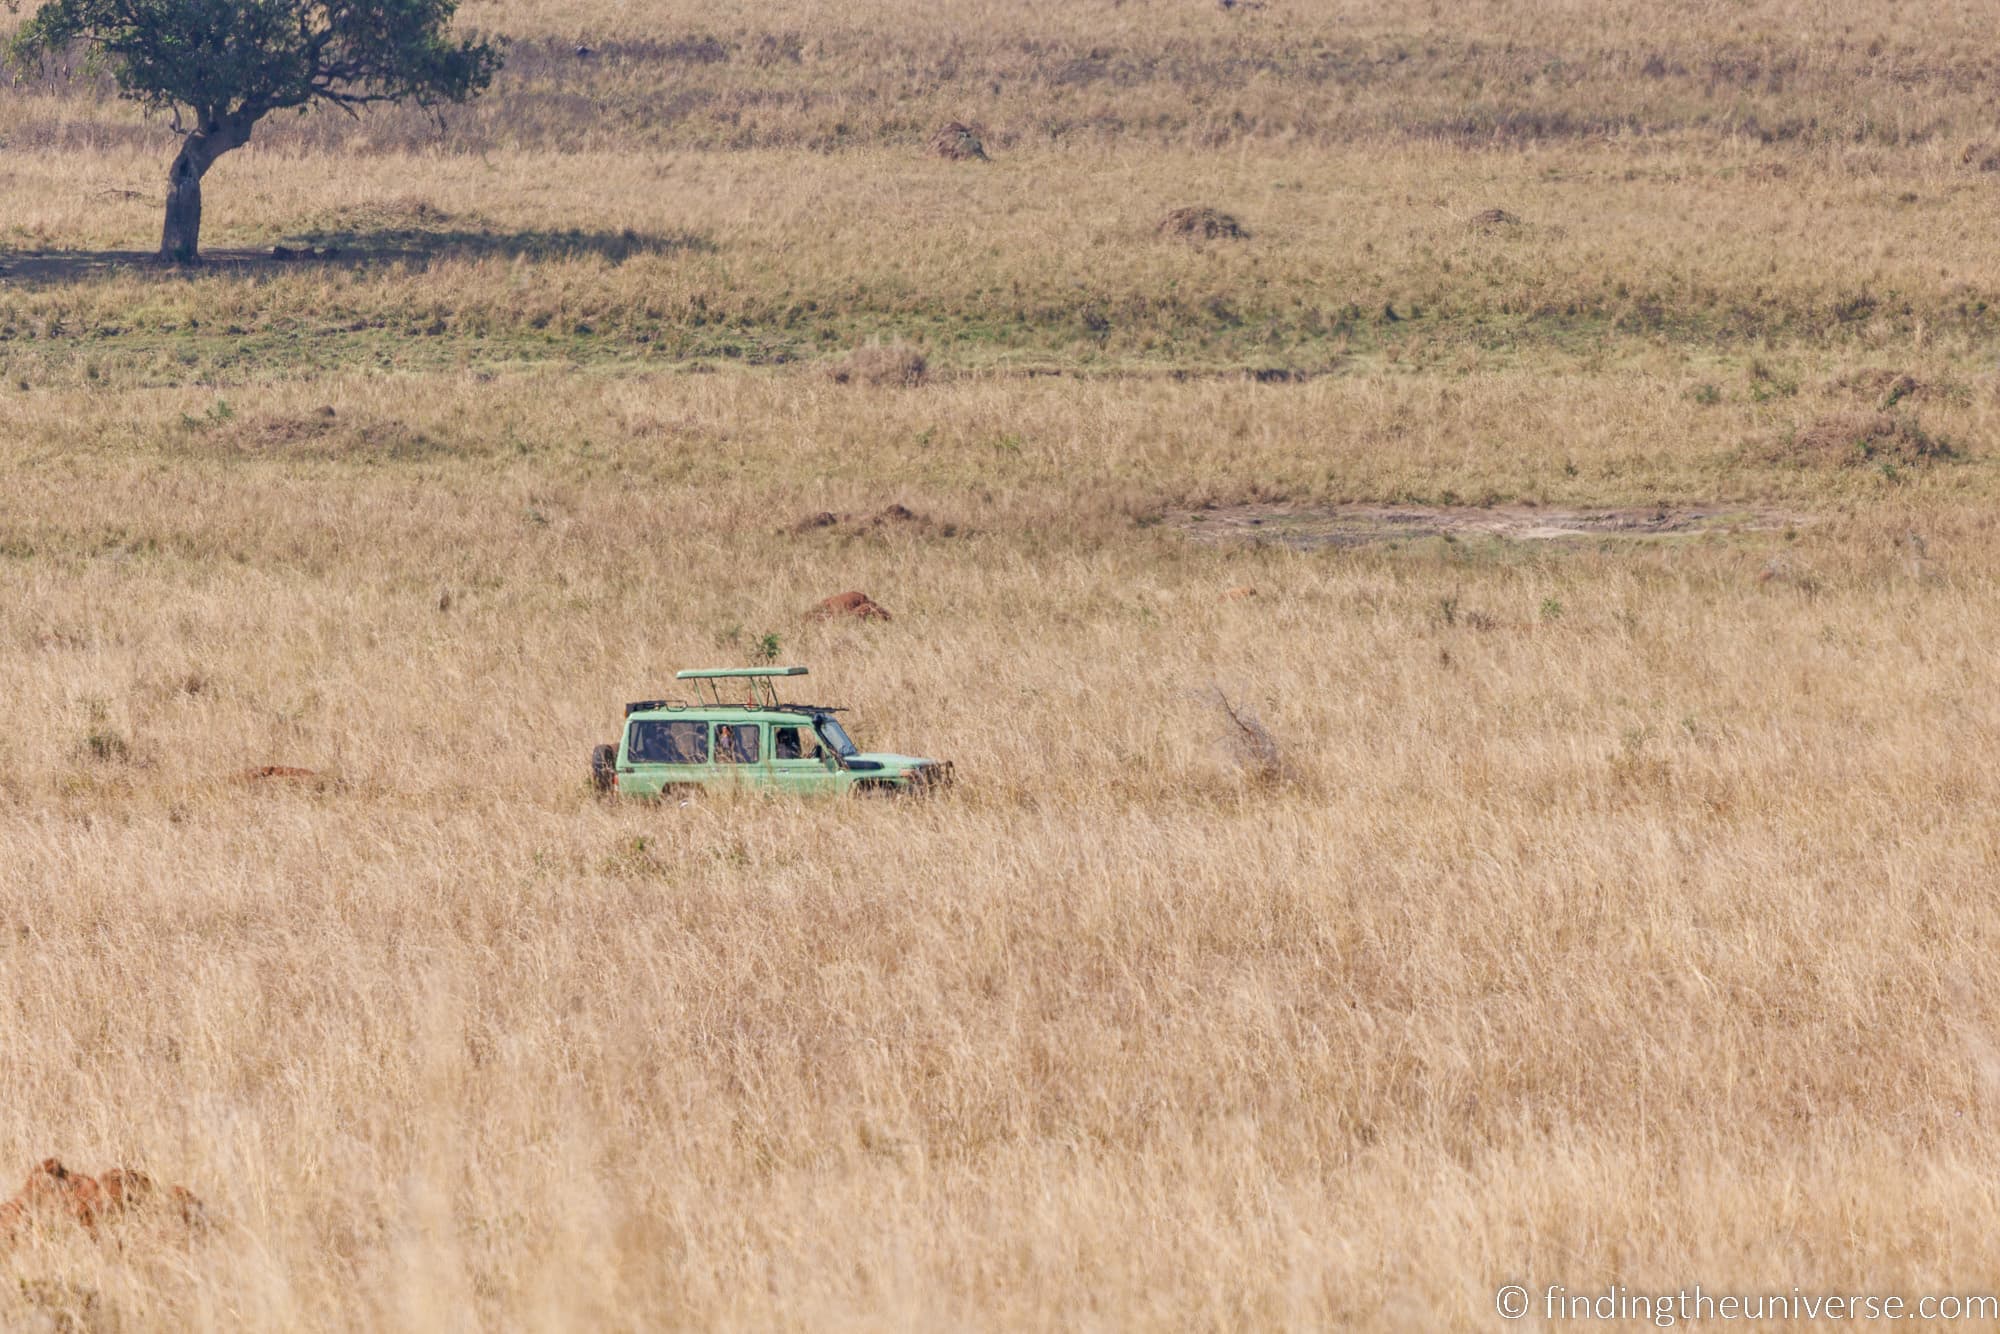
A cursory glance at the above image would suggest all is well. It’s shot at a fast shutter speed, and the vehicle appears to be sharp and in focus. However, let’s crop in on the vehicle itself.
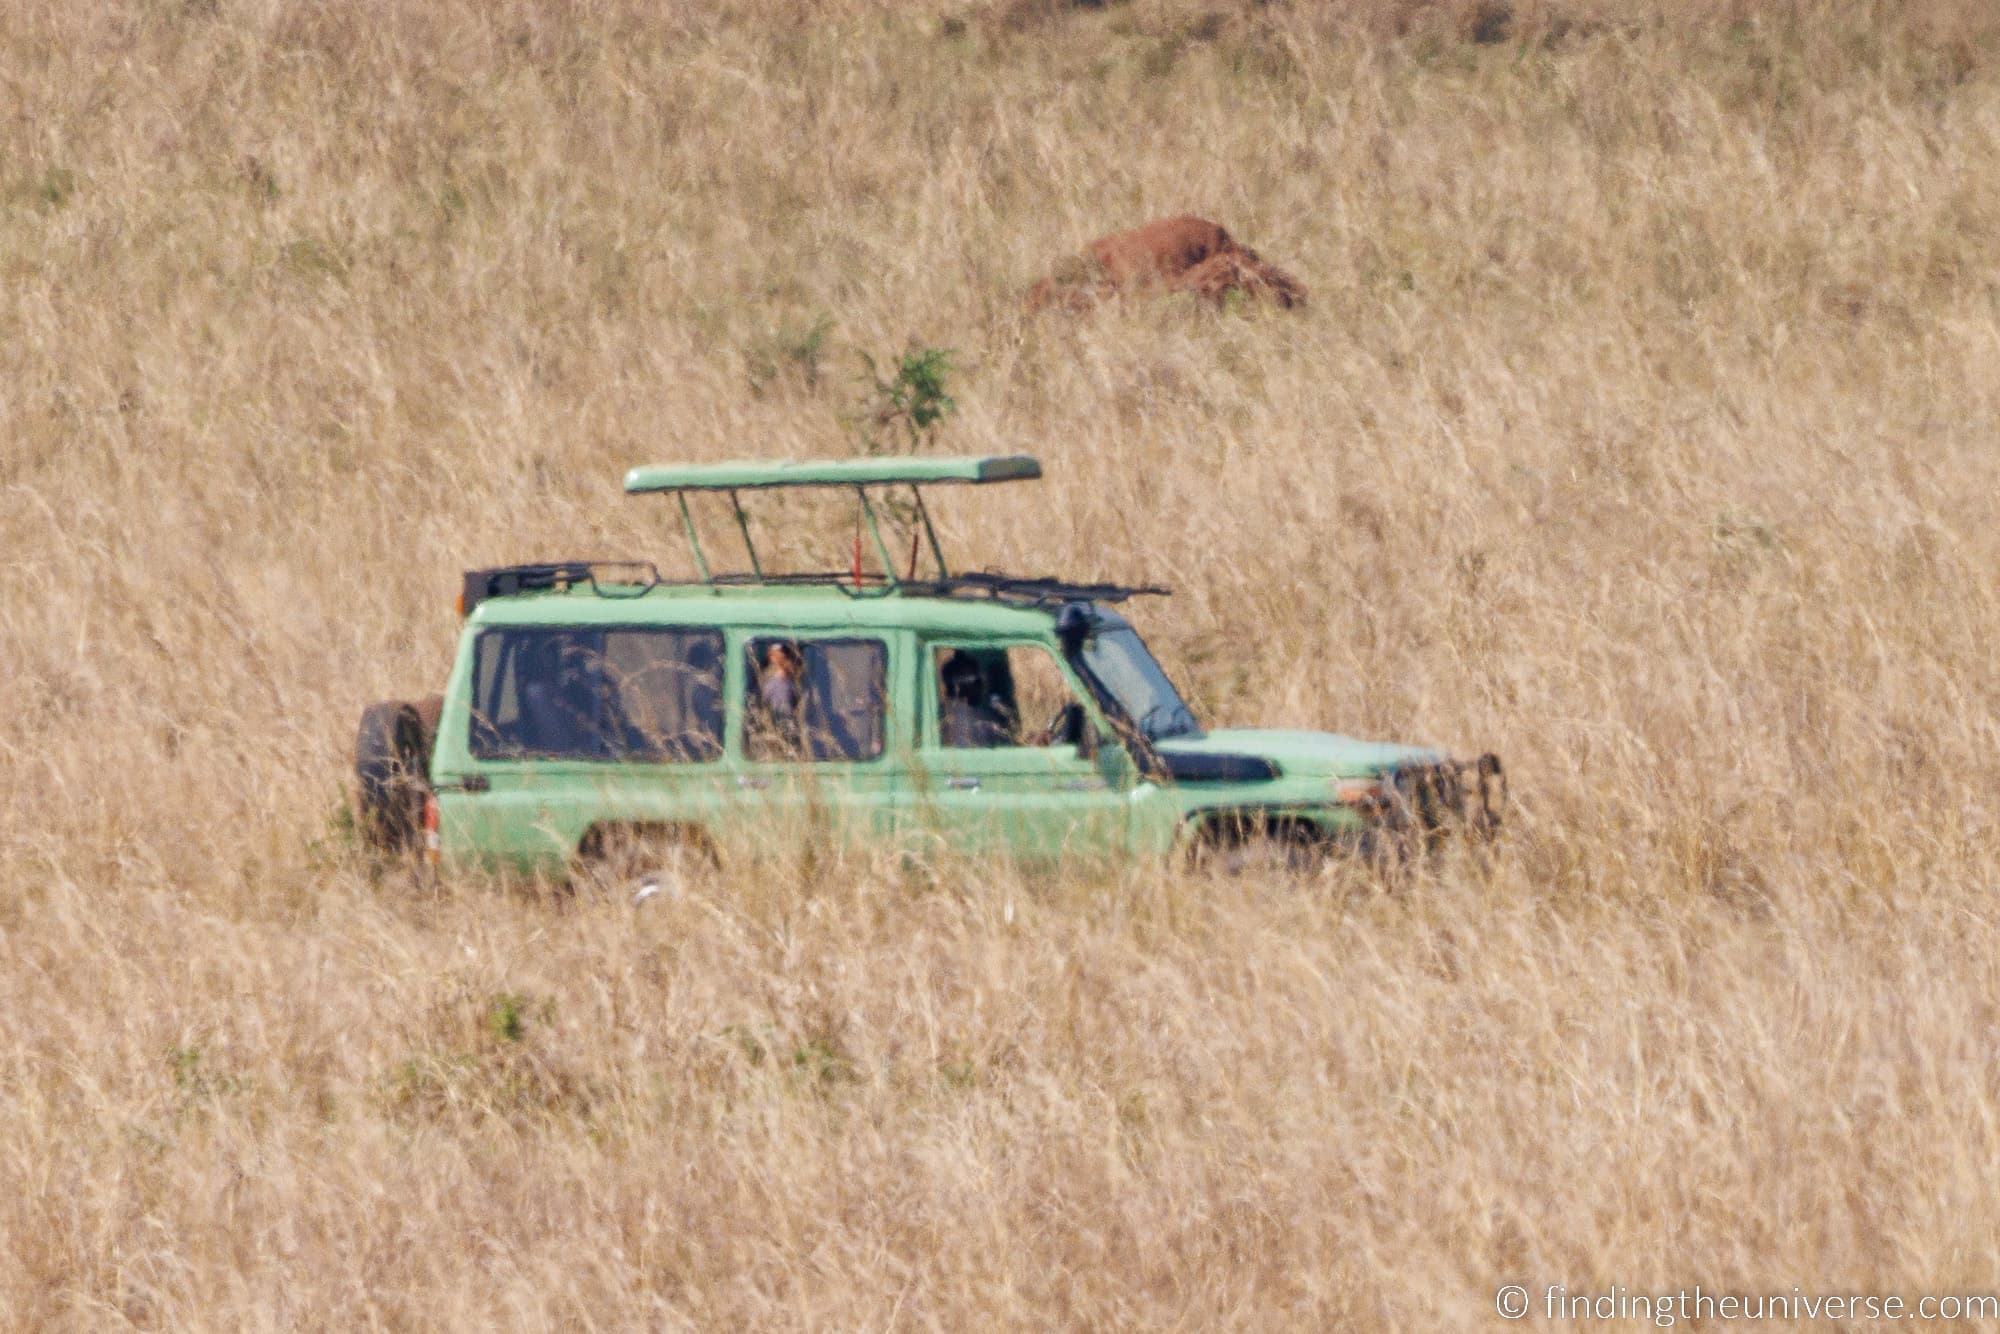
Suddenly things aren’t looking so good. The jeep is soft and the edges seem a bit wiggly. The heat in the air is distorting the light, resulting in a less than perfectly sharp shot. You can click on the image for a full-size version.
It’s worth noting that heat haze doesn’t actually need a hot day. All it really needs is a temperature difference between the ground and the air above it. So even on a relatively cold day the effects can be observed.
This is often the case when shooting over a large body of water like a lake or an ocean, where the water temperature might differ significantly from the air temperature above it. Let’s look at a couple of example images taken from the same location.

In the shot above you can see the chimney stack to the left is sharply in focus. The lighthouse in the background looks ok, but let’s look at a different shot where the lighthouse is the main subject and we crop in on it.
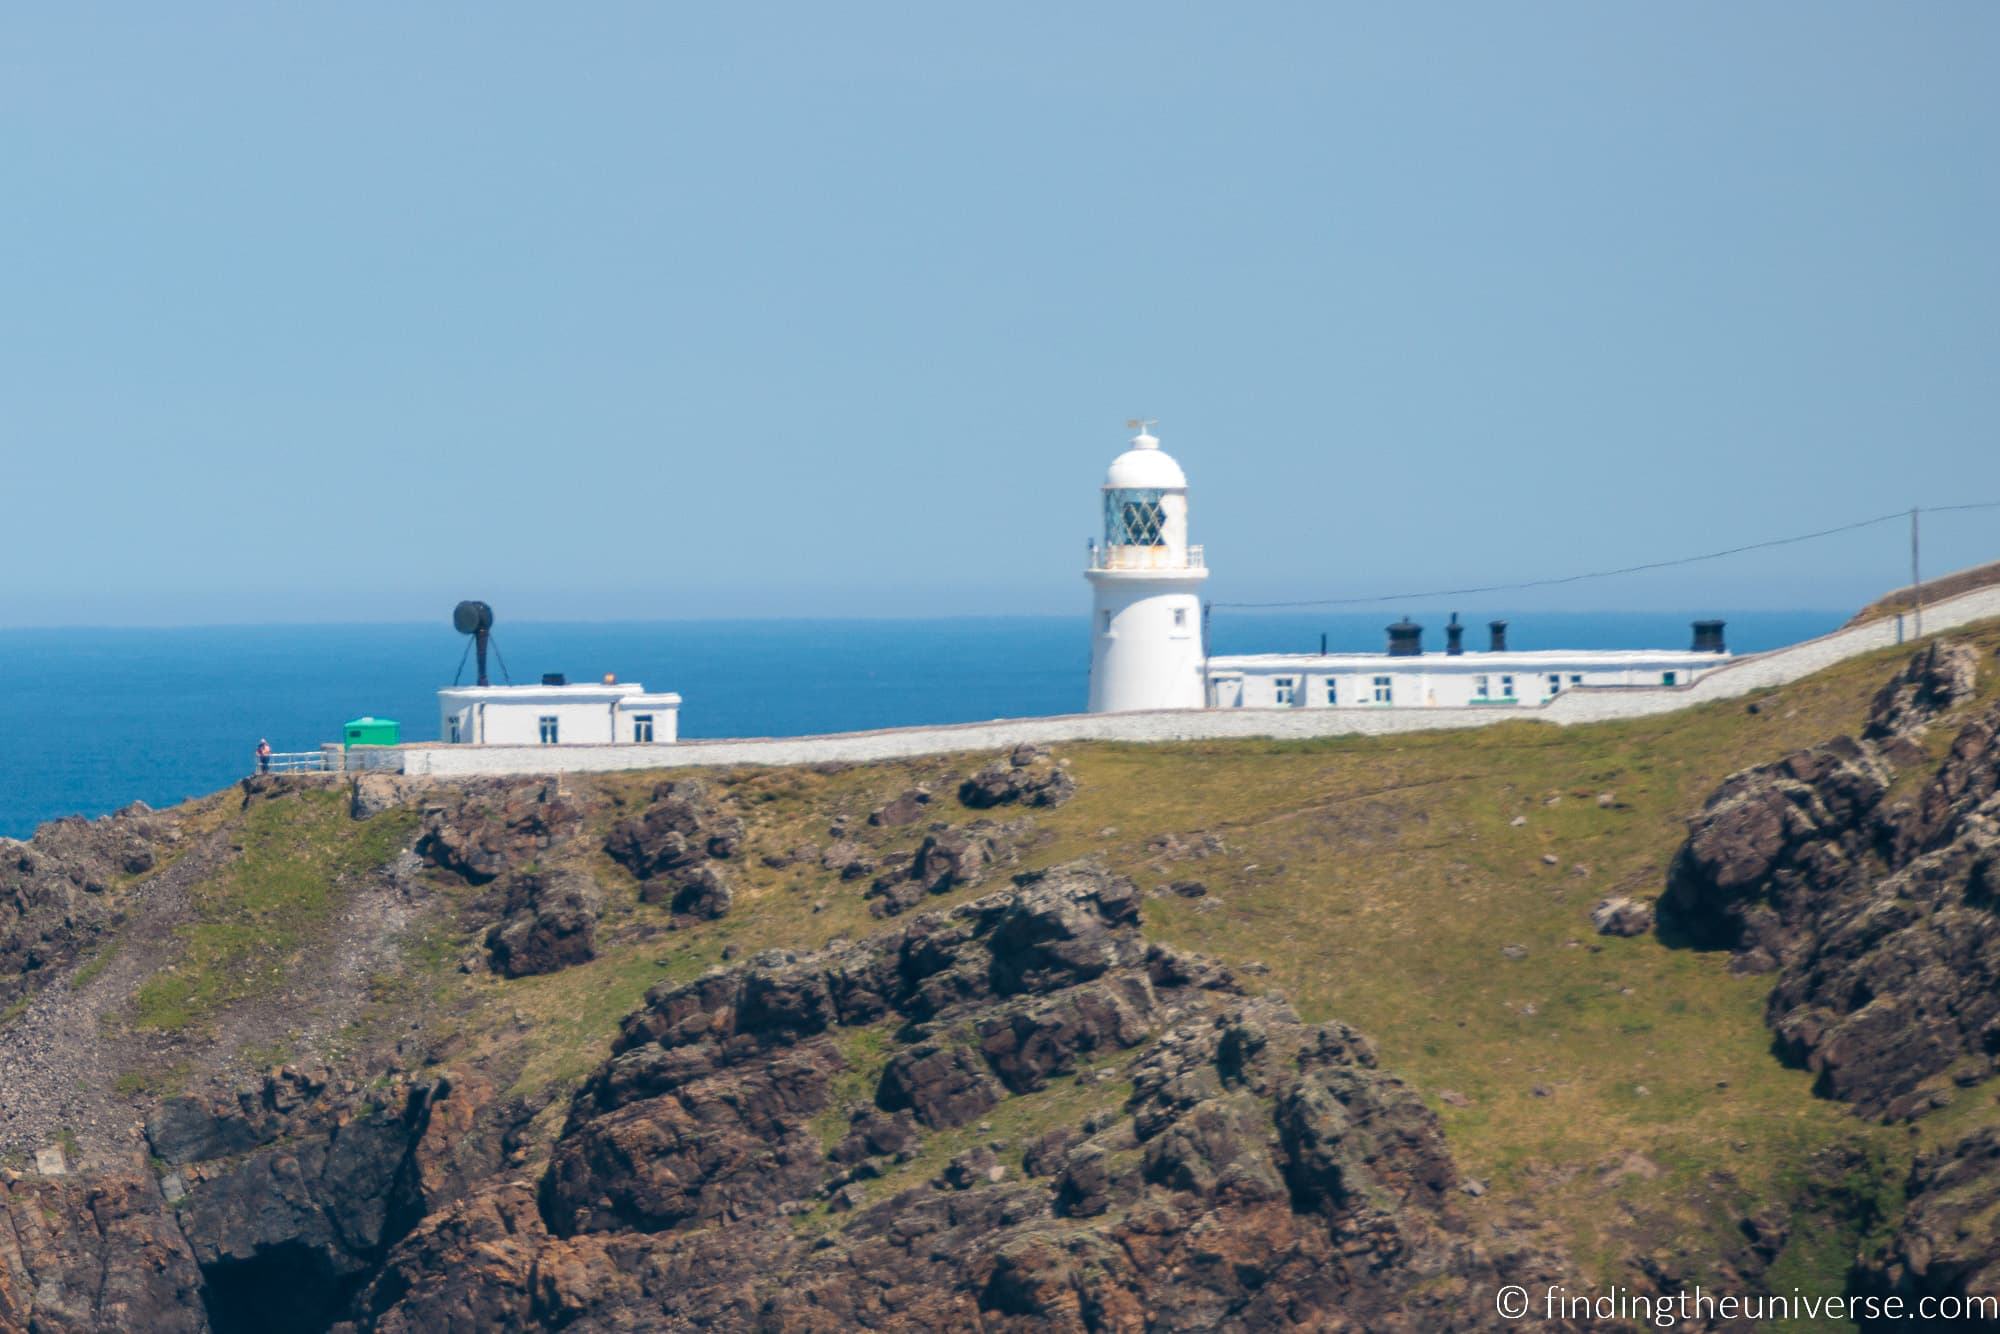
The lighthouse is actually sitting on a cliff and there is water between me and it. This results in the image no longer being sharp, partially thanks to heat distortion. If you open up the lighthouse image full screen by clicking on it, this effect will be far more obvious.
How Does Heat Haze Affect Photographers?
The main way that heat haze affects photographers is that it can result in images that are not sharp.
So even if you have your camera set up perfectly, with the appropriate shutter speed, aperture, and focus settings, you might find that your images still come out a little blurry.
The effect gets more pronounced the further away your subject is, and is particularly obvious when shooting with a big telephoto lens.
This is because the further away a subject is, the more disturbed air there will be between your camera and the subject. The telephoto lens effectively magnifies the distortion.
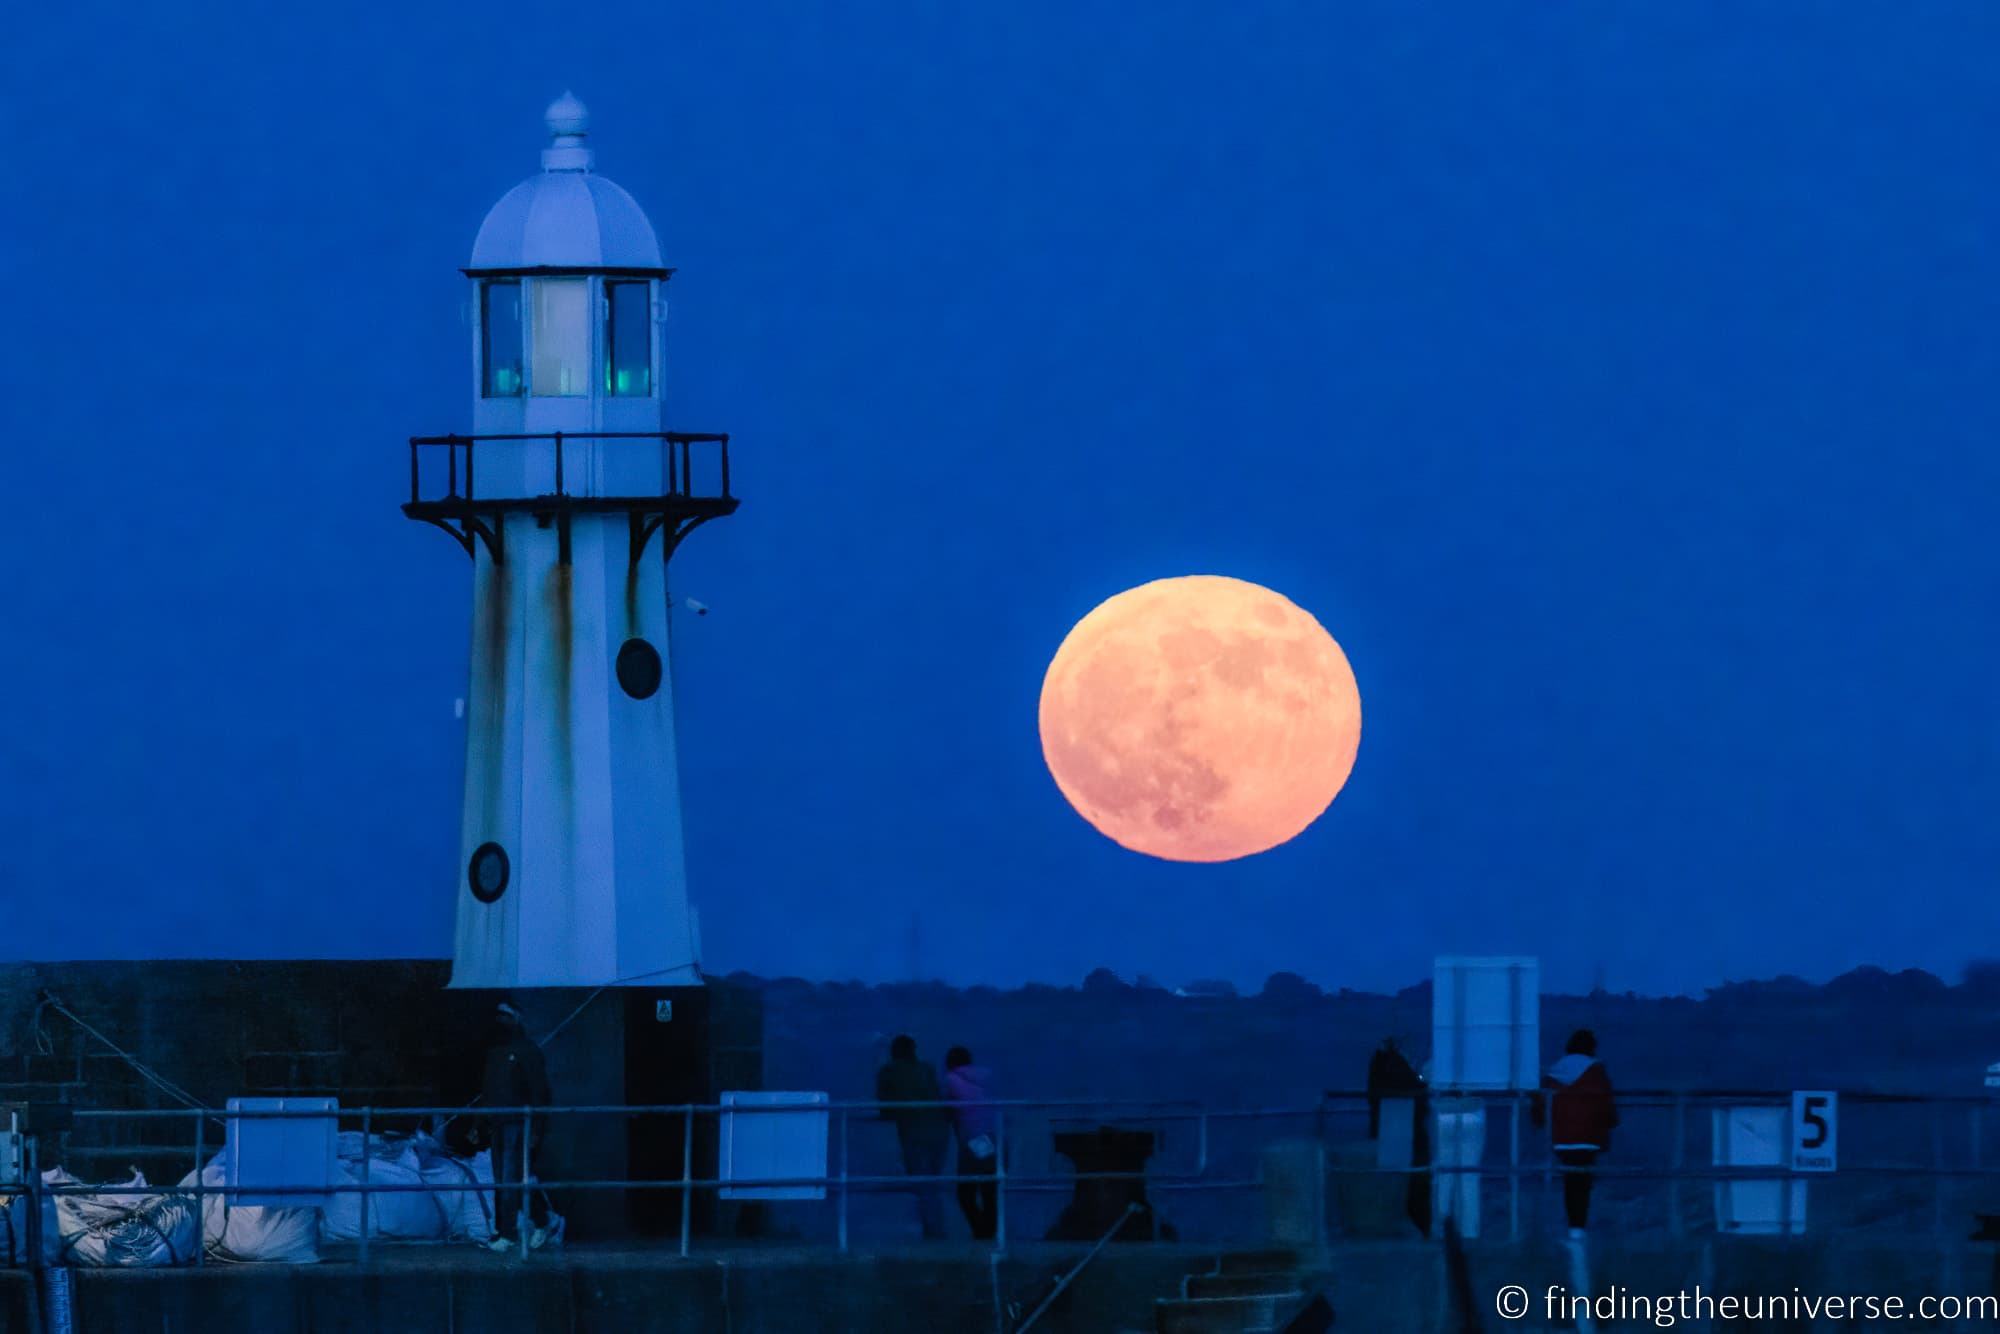
In the shot above, obviously the moon is quite far away! This was also shot across the sea. Now, the edges of the moon should be nice and round, but if you look closely they look wobbly as a result of heat distortion.
How to Avoid Heat Haze?
Let’s get the bad news out of the way first. Unlike camera settings like aperture, shutter speed, or focus mode, you can’t avoid heat haze by changing a setting or two. If there is heat haze in the air, it is going to affect your photos, and it will be worse for more distant subjects.
However, now you are aware of heat haze, there are some steps you can take to mitigate and avoid blurry images.
First, if you are shooting when there is heat haze you need to try and minimize the impact it has on your photos. The best option is to reduce the distance between yourself and your subject if possible, as this reduces the amount of disturbed air the light has to pass through.
For example, see if you can move closer to the subject you are photographing rather than using your camera’s zoom to get a closer up shot. Or in my case below, you can wait to see if your subject moves closer to you.
Let’s look at two examples.
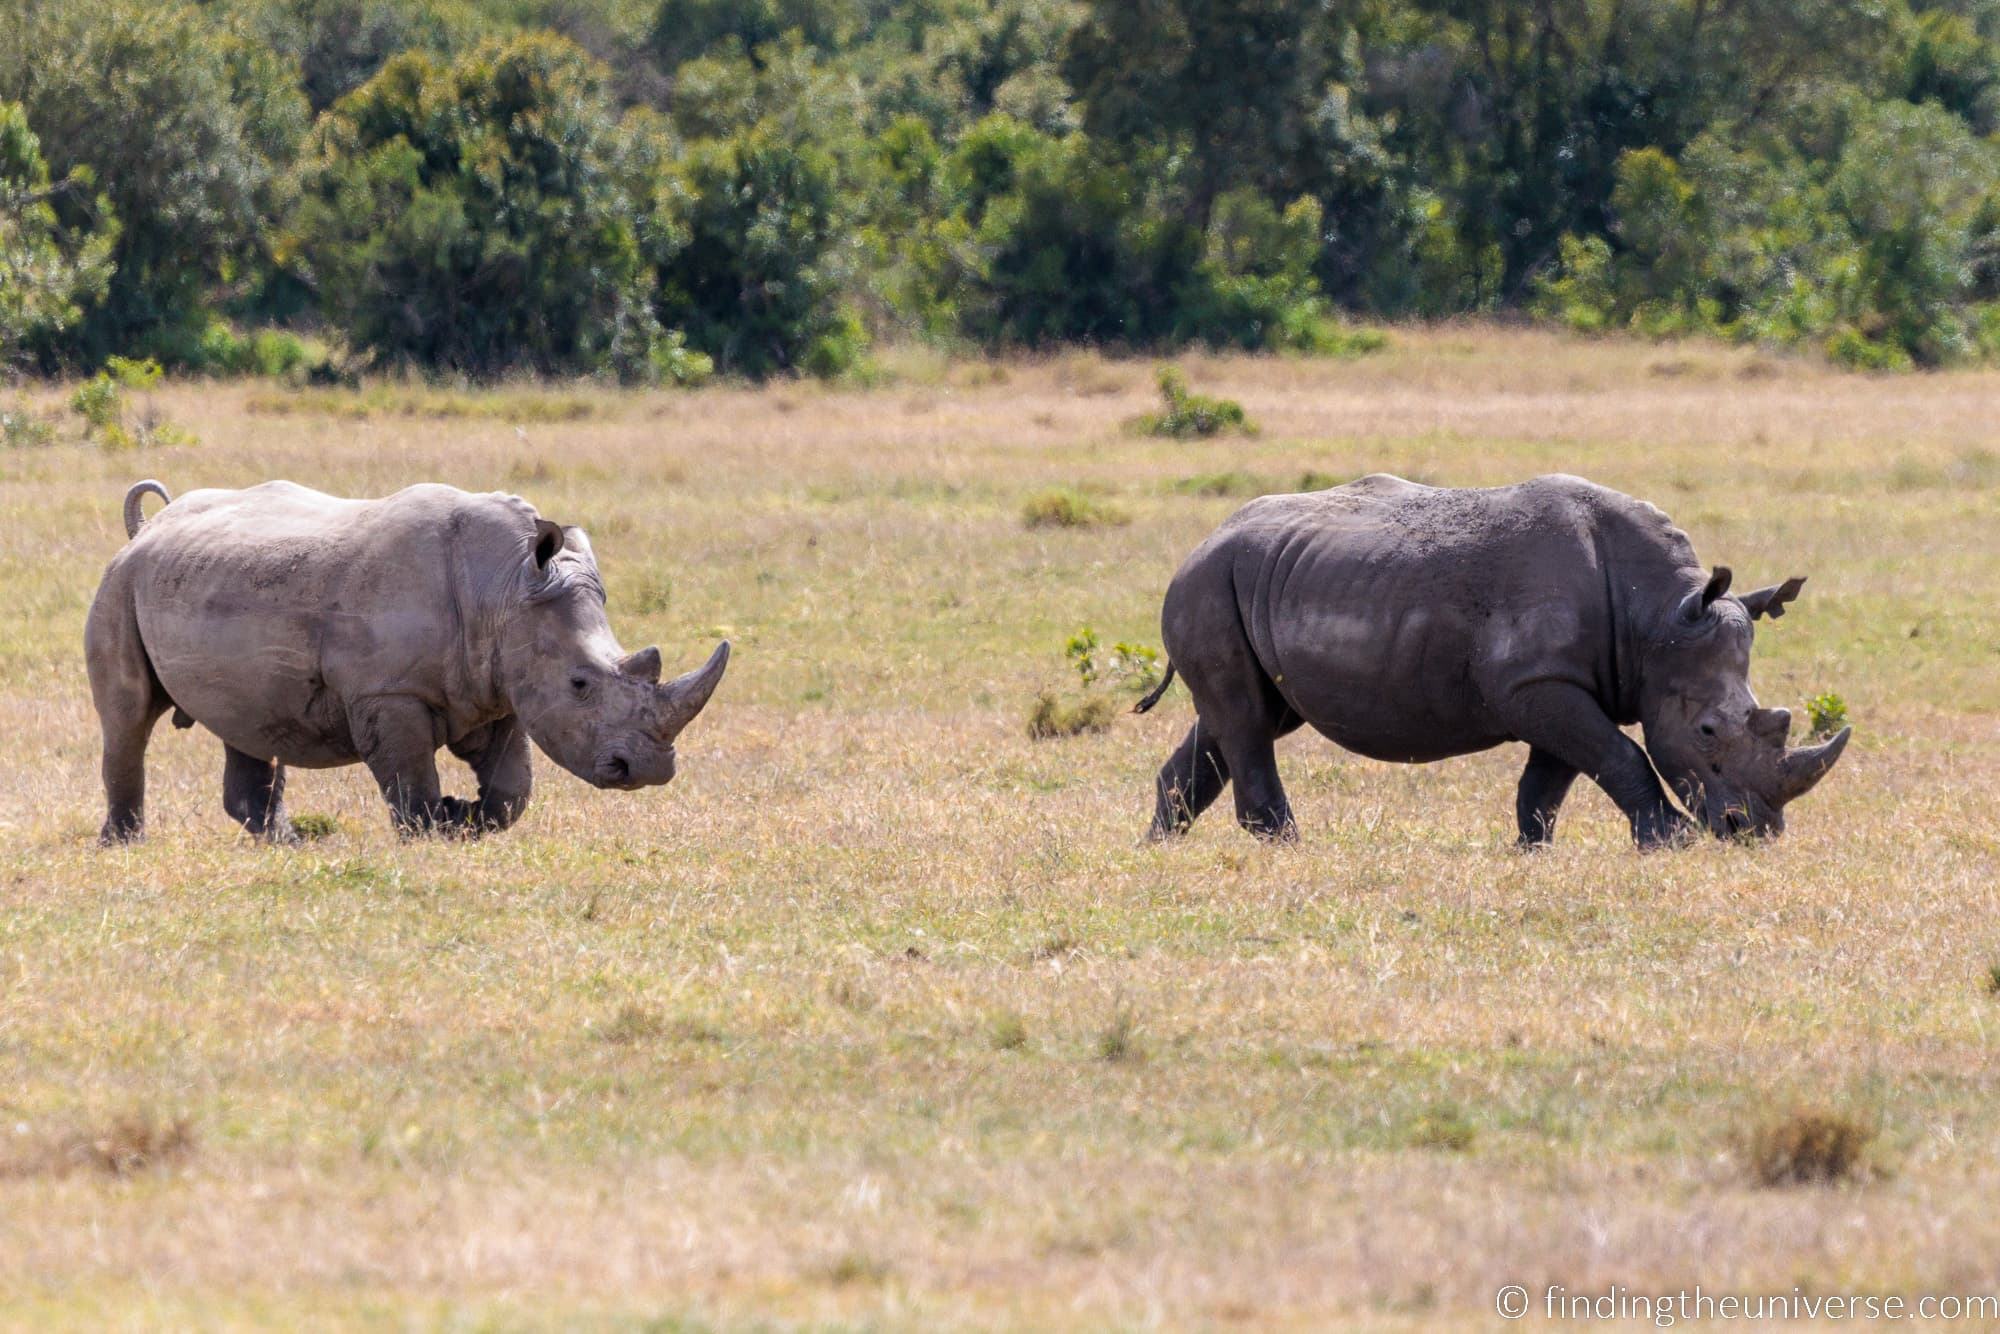
In the first shot below of the two rhino, they were further away. This was shot around midday and the heat haze results in the shot being fairly unsharp.
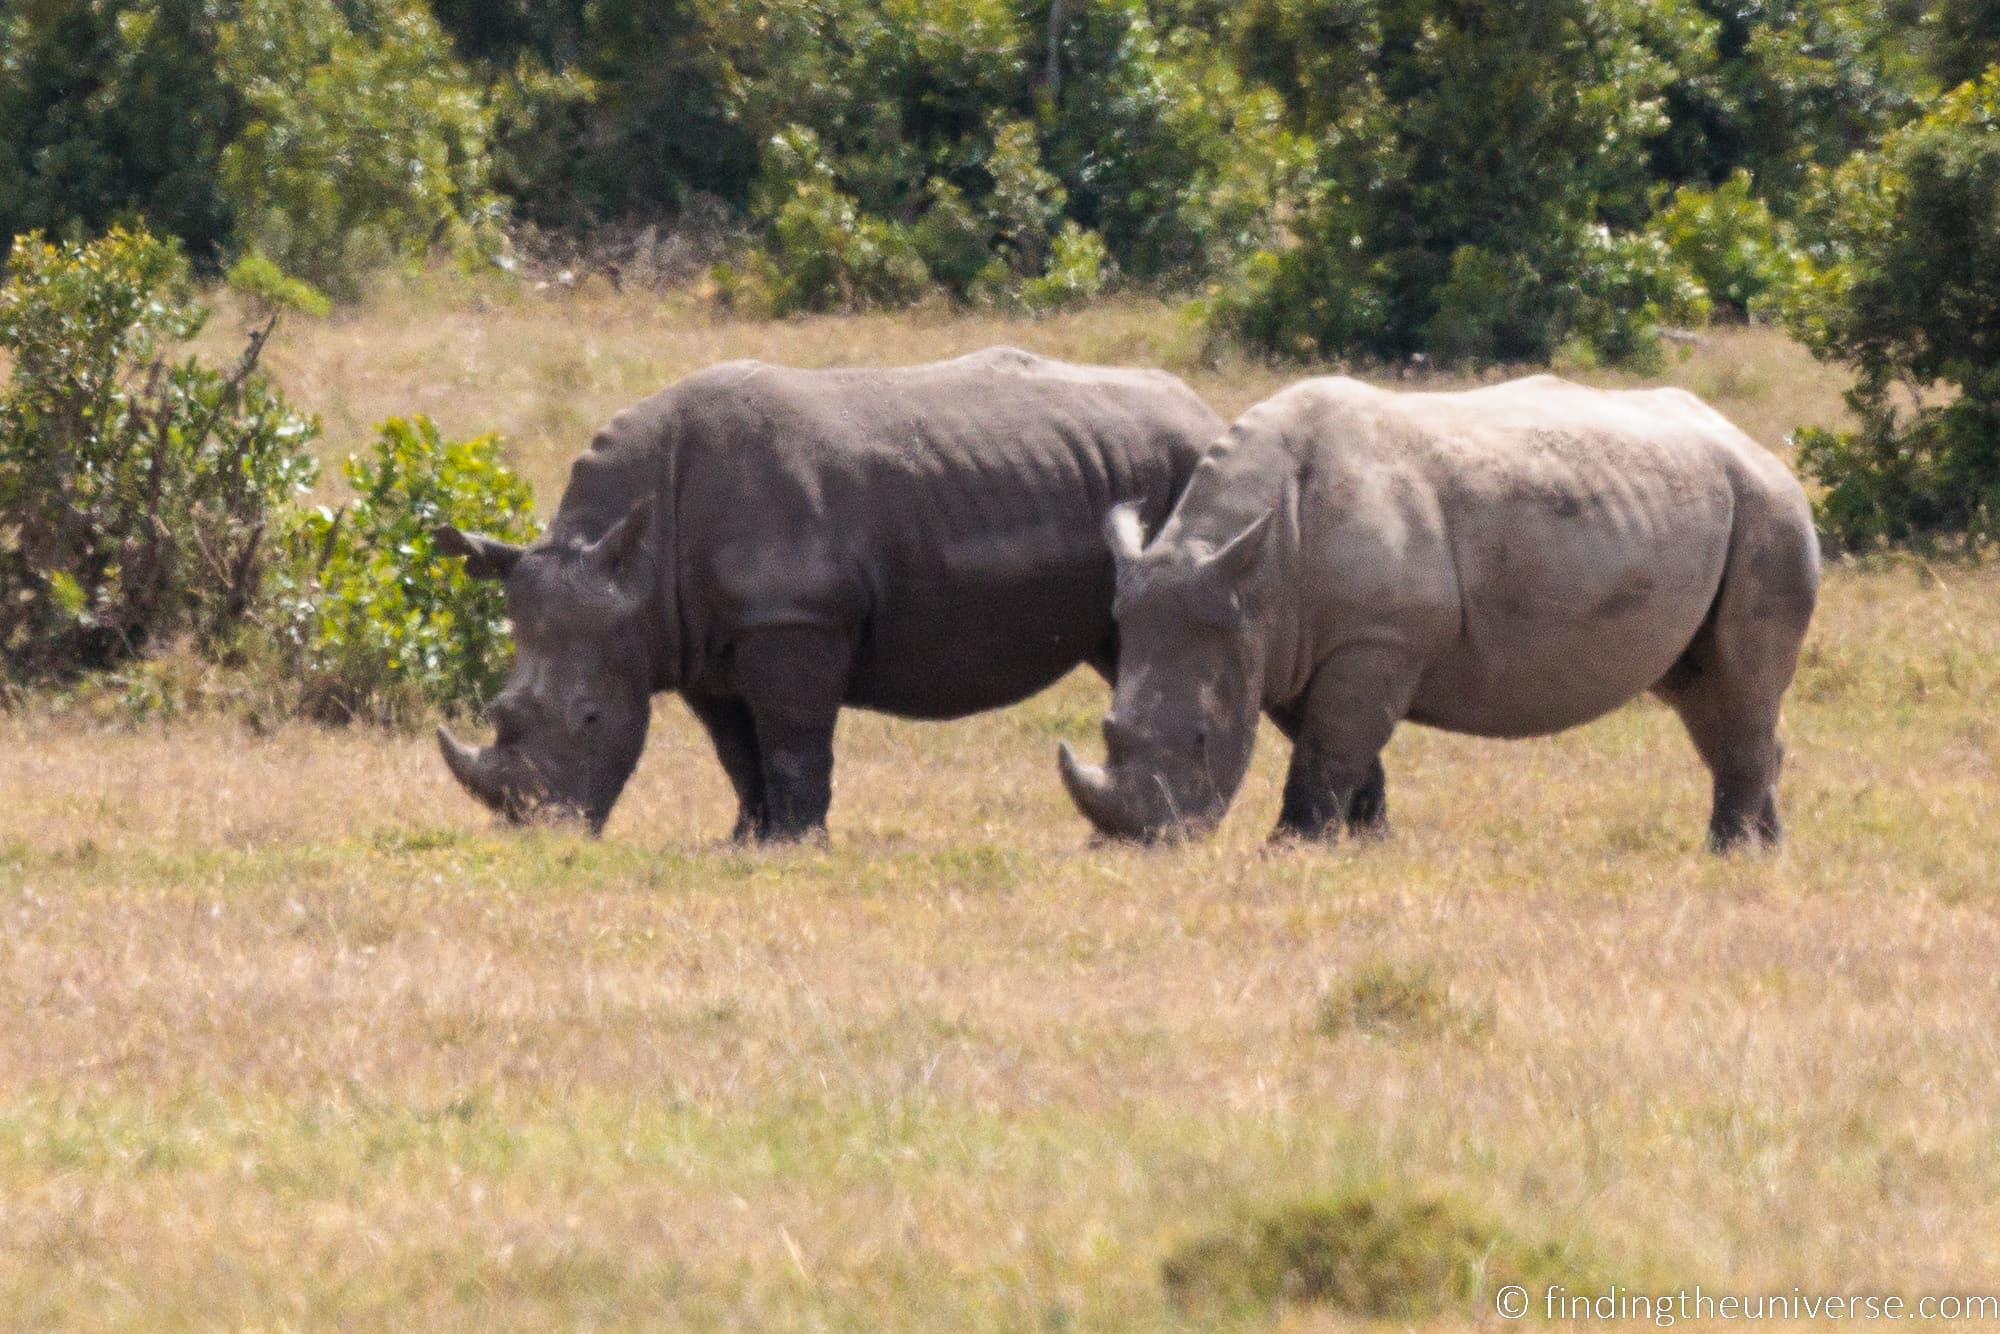
In the second shot, the rhinos actually moved much closer. You can see how much sharper and well defined they are in this second version.
If you are out when heat haze is starting to affect your images, try to avoid photographing over surfaces which heat up. Asphalt roads are an excellent example of surfaces which heat up a lot, so if you can reposition not to have them in your line of sight when shooting that would be ideal.
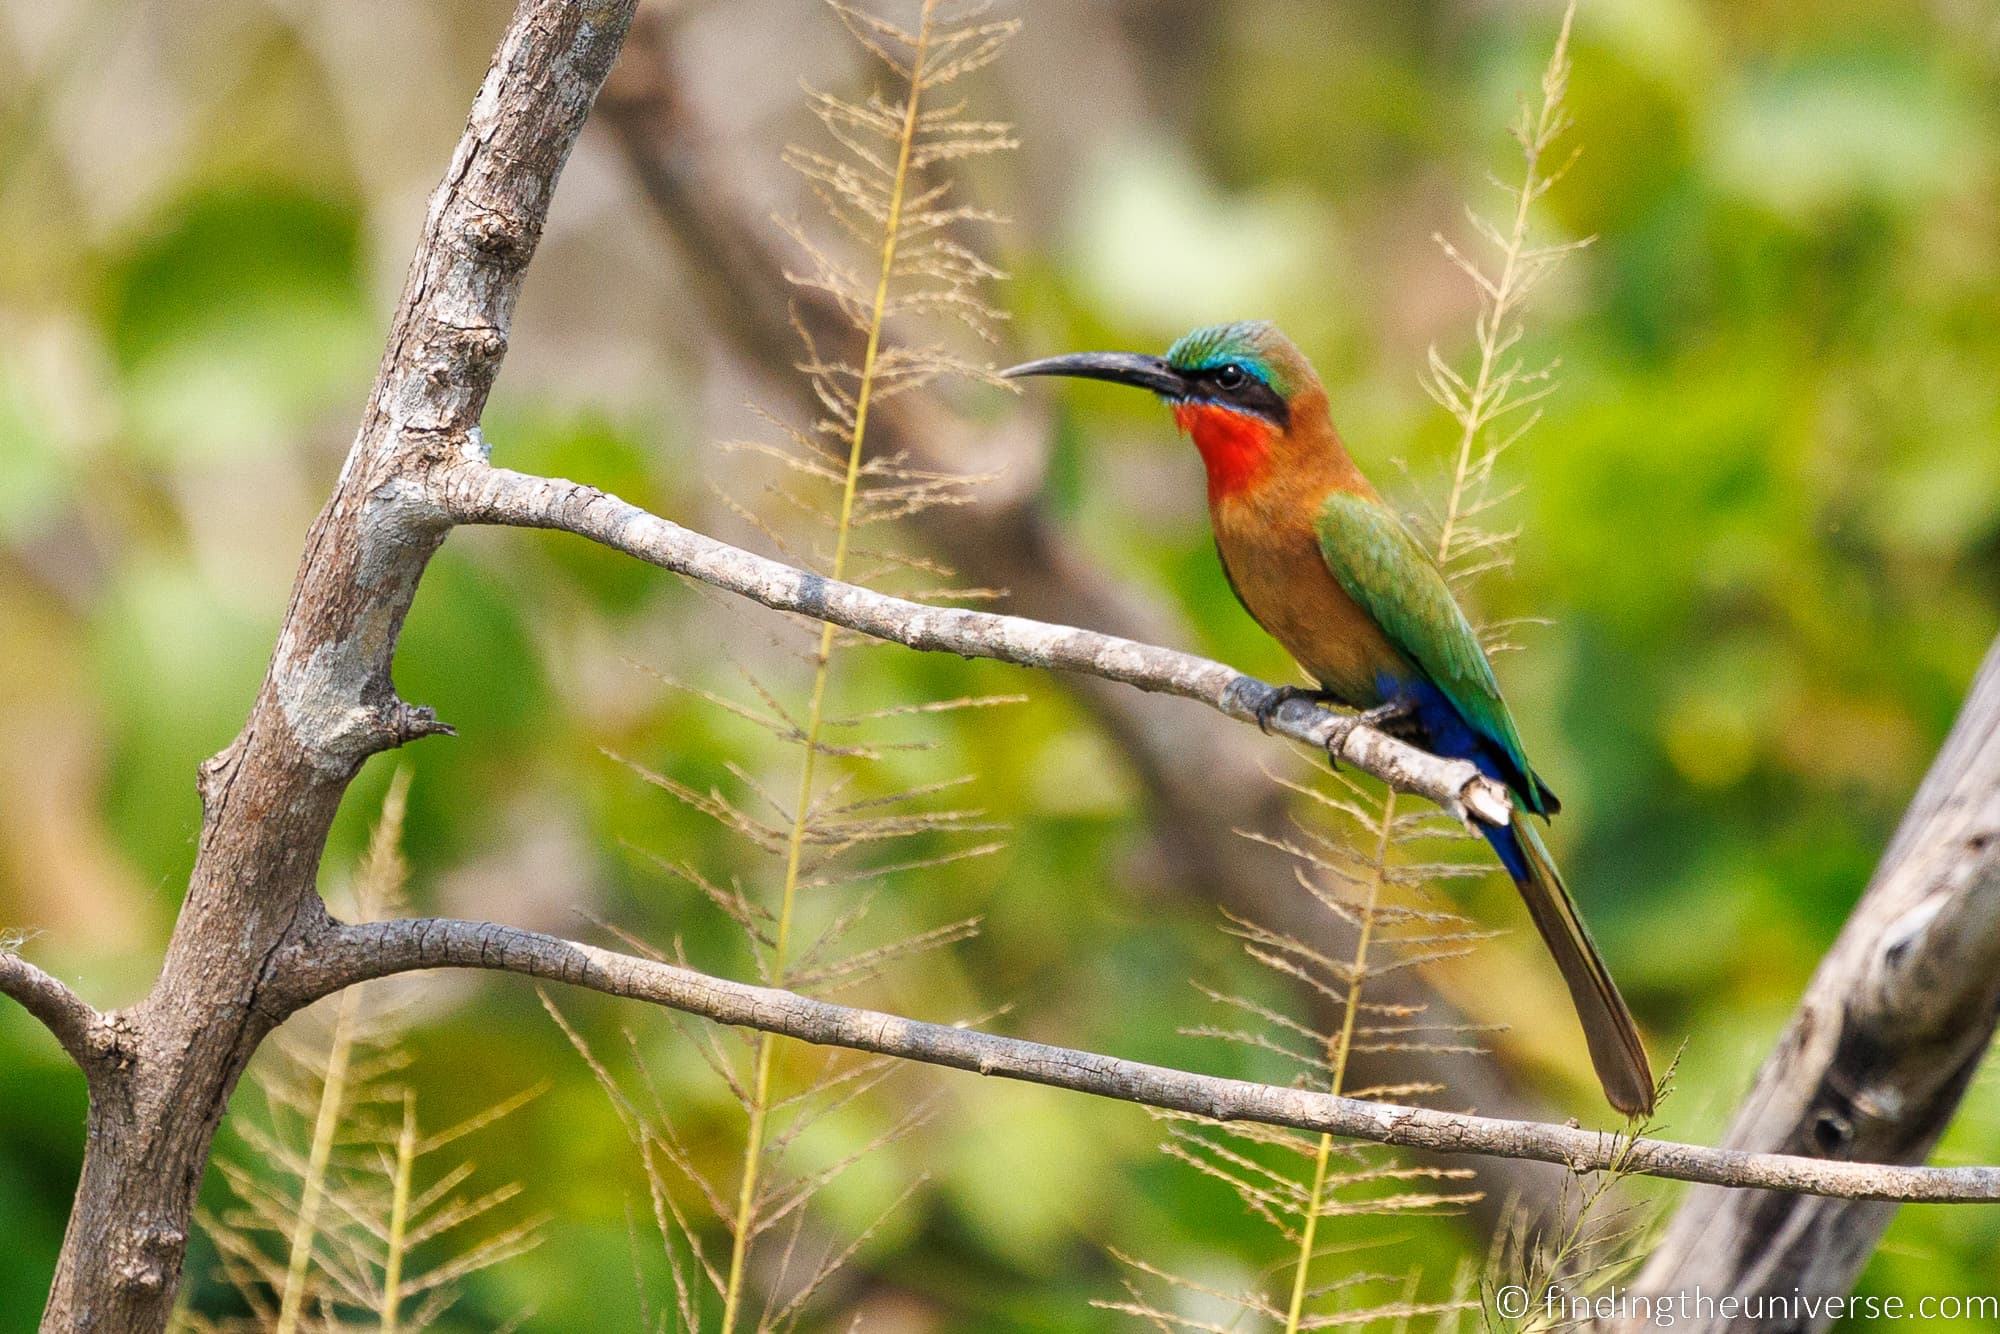
Another option is to avoid shooting subjects close to the ground. For example, if you are out shooting birds, look for birds in flight. Heat haze tends to be more pronounced closer to the ground, with higher air being less disturbed. So focusing on higher subjects such as birds in flight should result in sharper images.
In an ideal world though, you would try to manage your photography sessions so that heat haze does not affect you. Many photographers, myself included, will tell you that the time around sunset and sunrise, the so-called golden hour and blue hour, are the best times for photography.
This is true for a number of reasons, including the angle and tone of the light, but also because the temperature differential between the ground and the air above it will be much lower at these times of day.
As a result, the air will be a lot clearer and your images will be a lot sharper. So always try to get out as close to sunrise as possible for the best results, with sunset being a second-best option as the ground starts to cool.
Here’s an example of an ostrich shot when there was both bad heat haze and a fair amount of dust in the air, resulting in a less than impressive image.
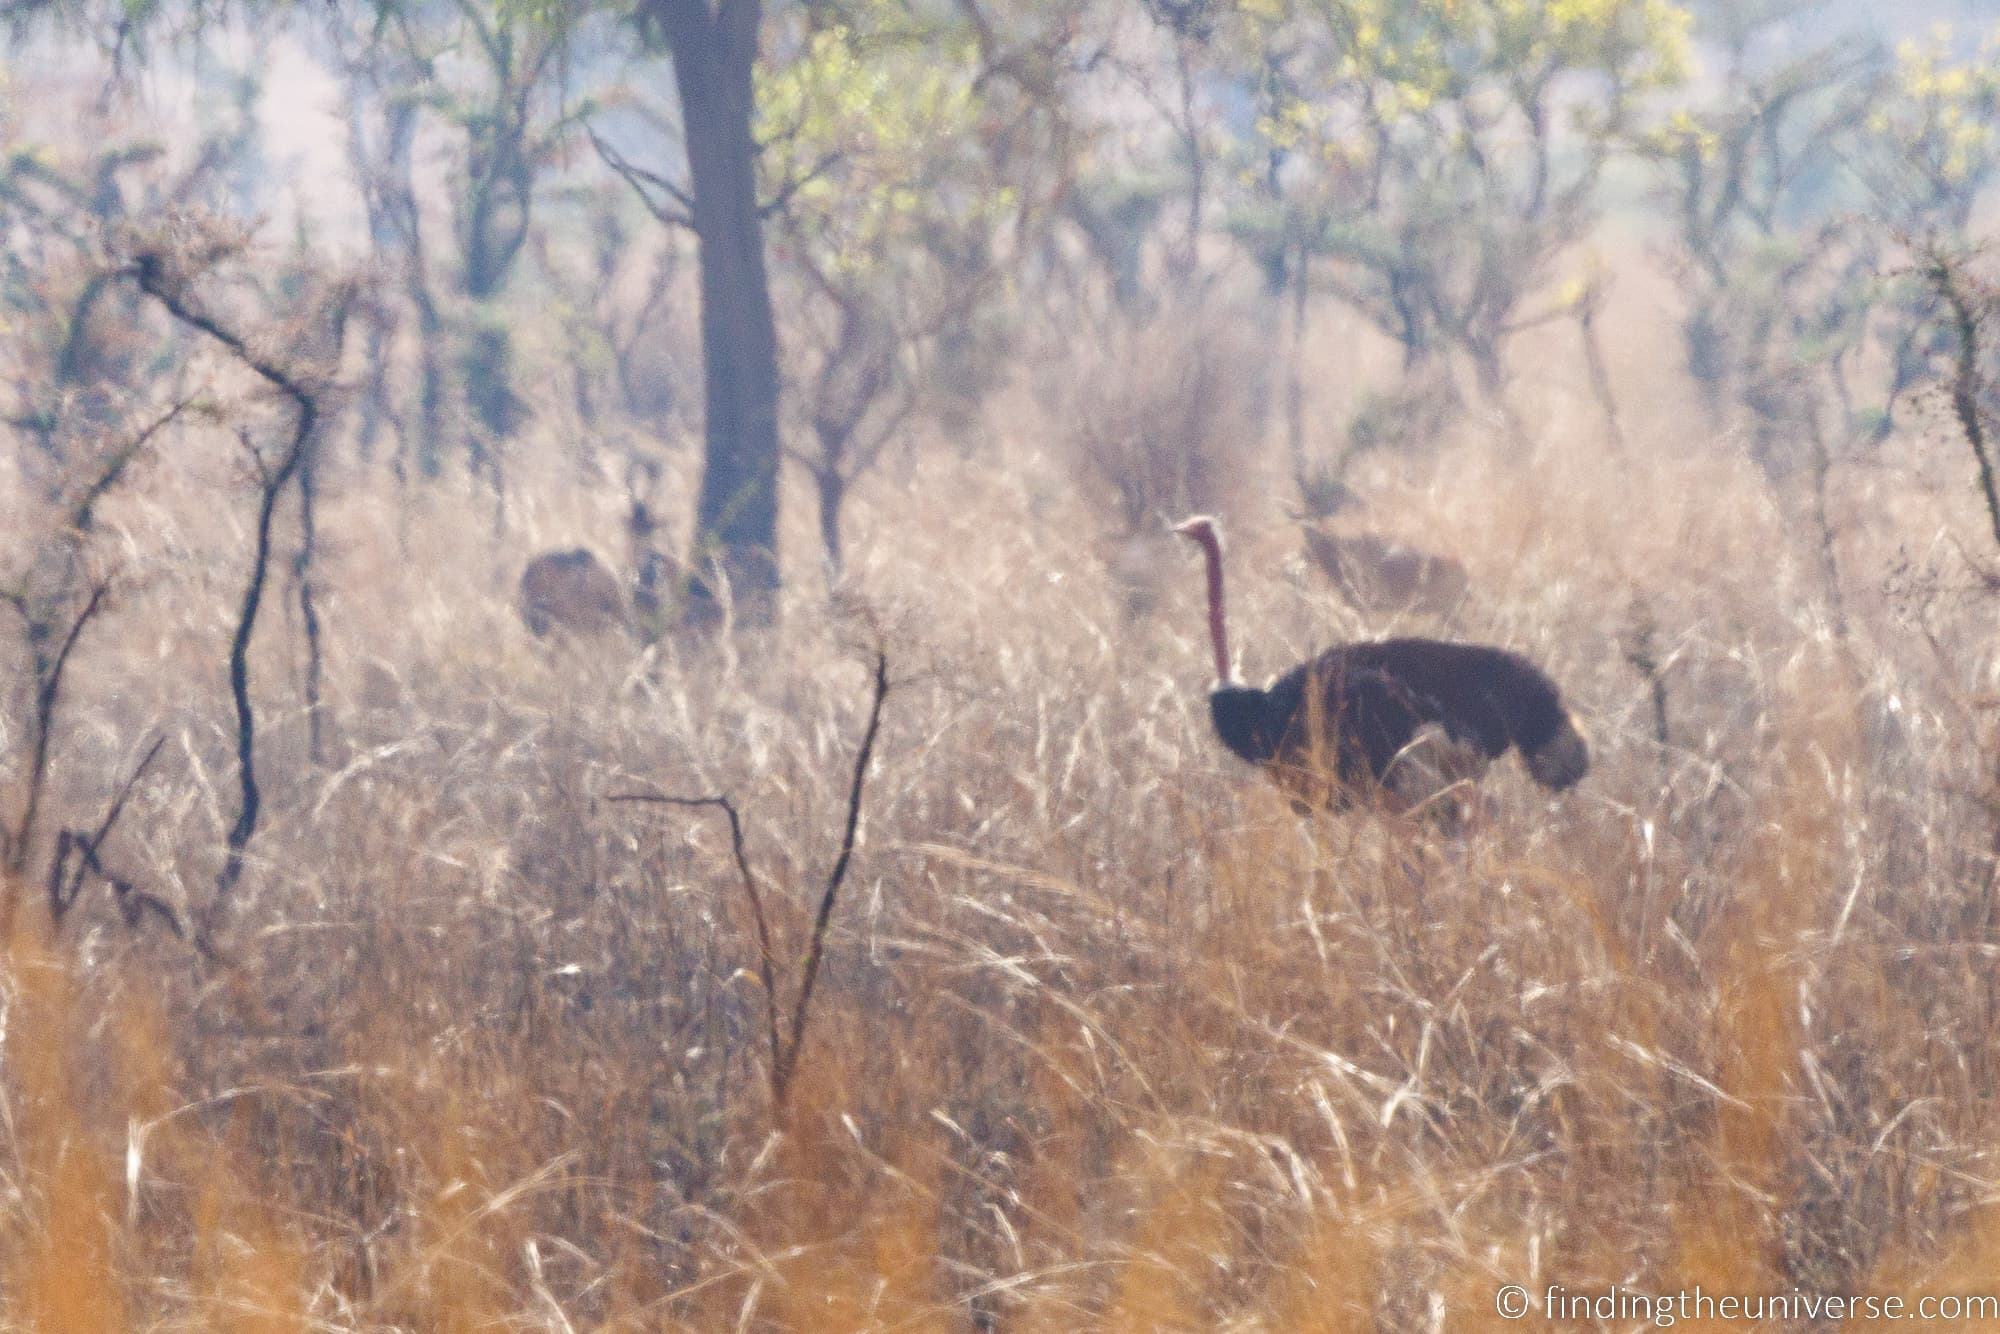
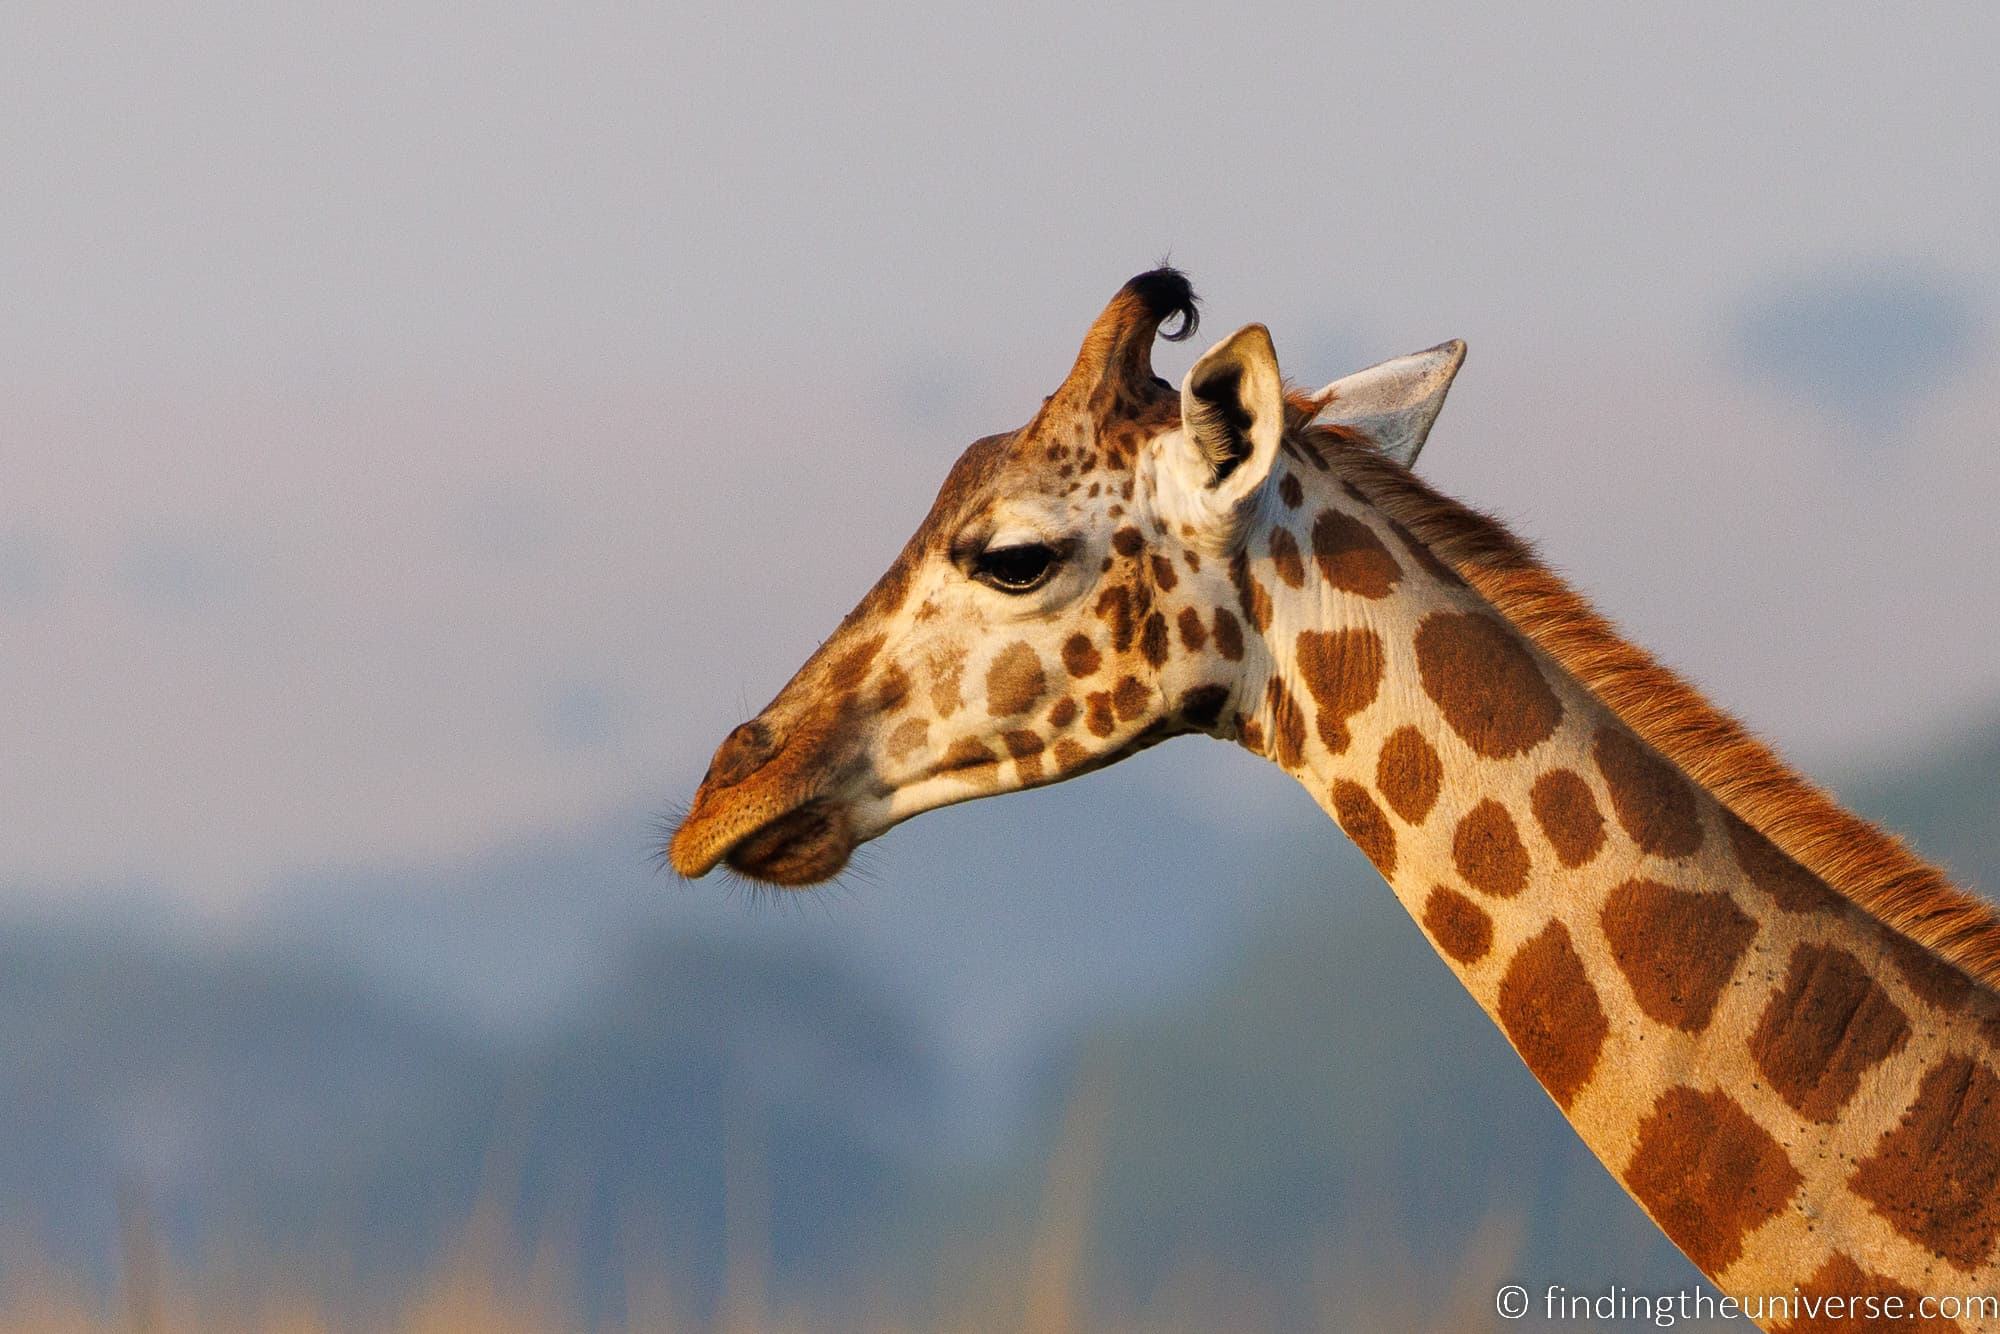
Meanwhile, here’s a giraffe shot in the morning with lovely golden light at a much closer distance using exactly the same camera setup in the same area.
Camera Accessories to Help with Heat Haze
The reality is that there are not really any accessories that can reduce heat haze in your photos.
However, there are a couple of accessories I recommend you have which can improve your photos when you are shooting with heat haze, as they mitigate other issues that can arise at the same time.
- Lens Hood. The first accessory I recommend is a lens hood. This reduces glare, and can result in clearer images. Since heat haze most regularly occurs during times of bright sunshine, you can improve your images by using a lens hood.
- UV Filter or Polarizing filter. UV and Polarizing filters can both improve your images by reducing the effect of atmospheric haze in your image. Whilst they don’t solve the heat haze issue, if you are shooting with heat haze you may also be affected by atmospheric haze. So at least you can improve image quality in one area with these filters.
Can you Edit Heat Haze Out of Photos?
In an ideal world, you would avoid heat haze entirely. However, this isn’t always practical or possible. So now you have some photos, and they are not as sharp as you would like. You might be wondering if there is anything you can do to improve these images.
The answer is yes, to a point. Personally, I’d recommend trying the Topaz Sharpen AI product. This is made by the same people who make Topaz DeNoise AI tool, one of my favorite image noise reduction tools.
Topaz Sharpen AI is a powerful piece of software which is specifically designed to improve the sharpness of an image, which it does using AI. It can definitely improve images affected by heat haze.
In my experience it works best with RAW files, as do most photo editing tools as there is more data available to work on in the image.
Now, Topaz Sharpen AI isn’t a miracle solution, and it won’t work for every image. However, if you have a number of images affected by heat haze, it is definitely worth running them through Topaz Sharpen AI to see if they are improved.
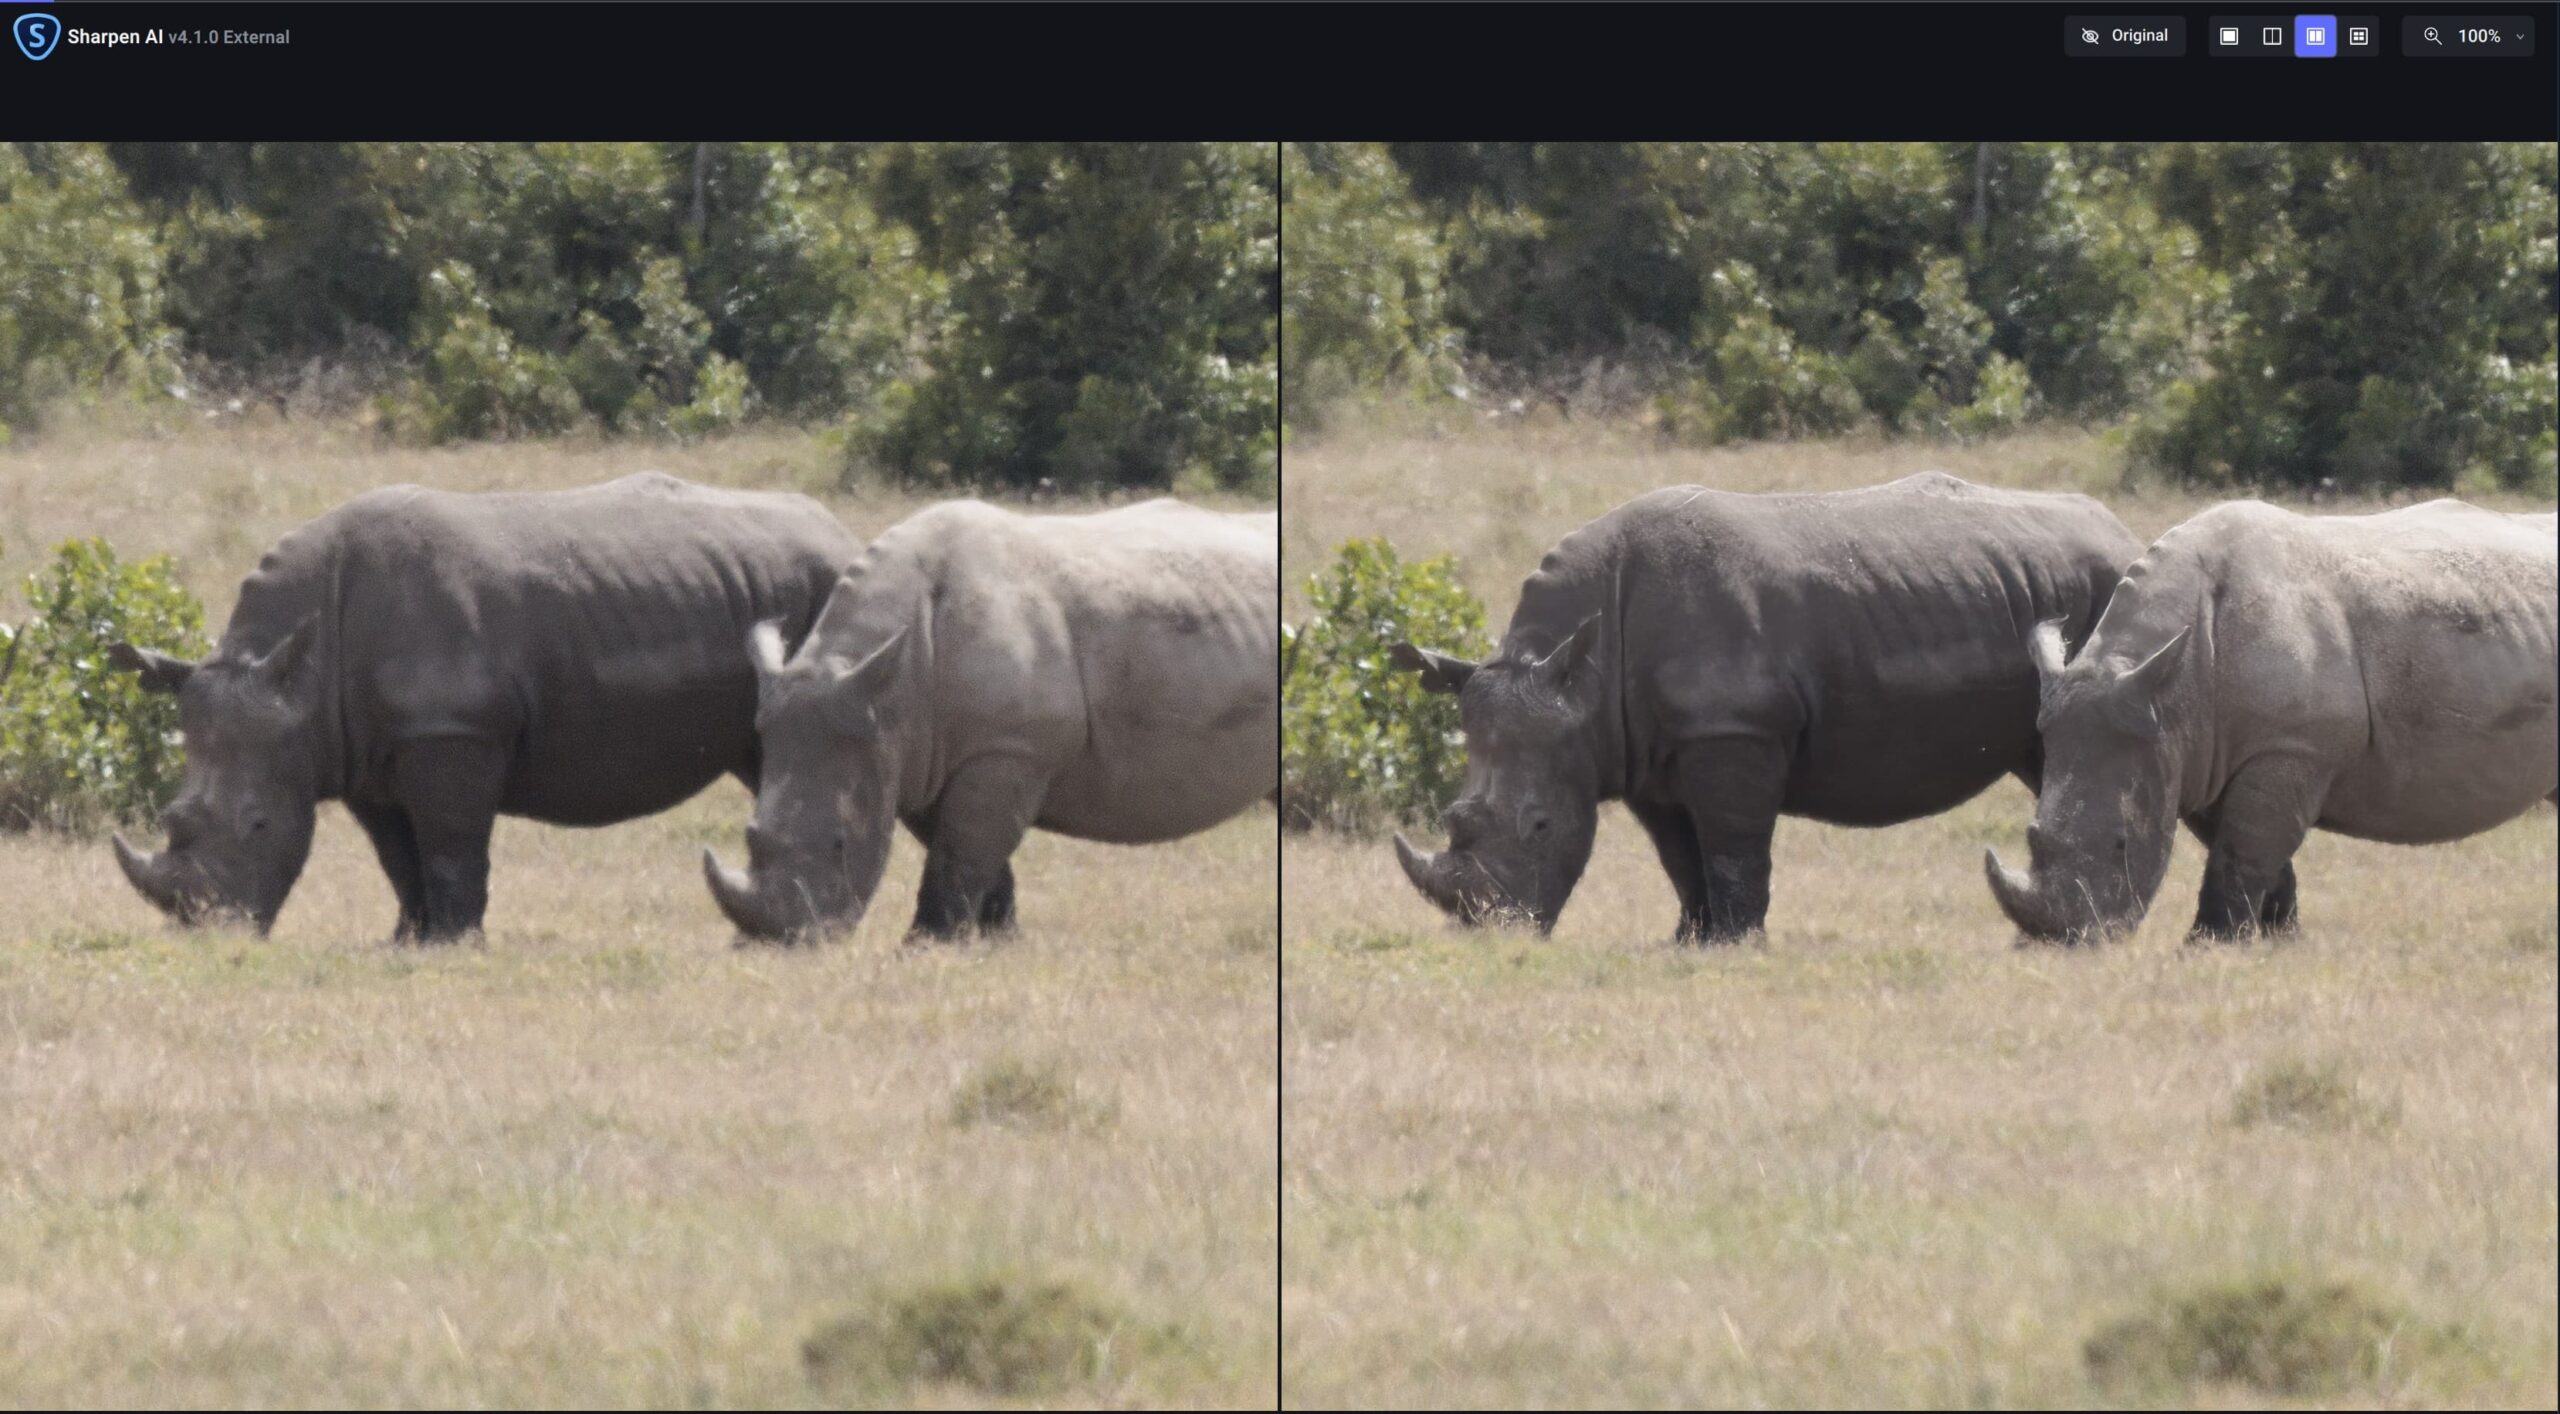
For example, I ran the pair of distant rhinos through Topaz Sharpen AI to see what improvement could be made. Here’s a side by side view of Topaz Sharpen AI, which also has intelligent subject selection so it only sharpens the relevant parts of the image, in this case, the two rhinos. You can click this image for a full size view.
And here’s the before and after images. You can click on them both for full size versions.
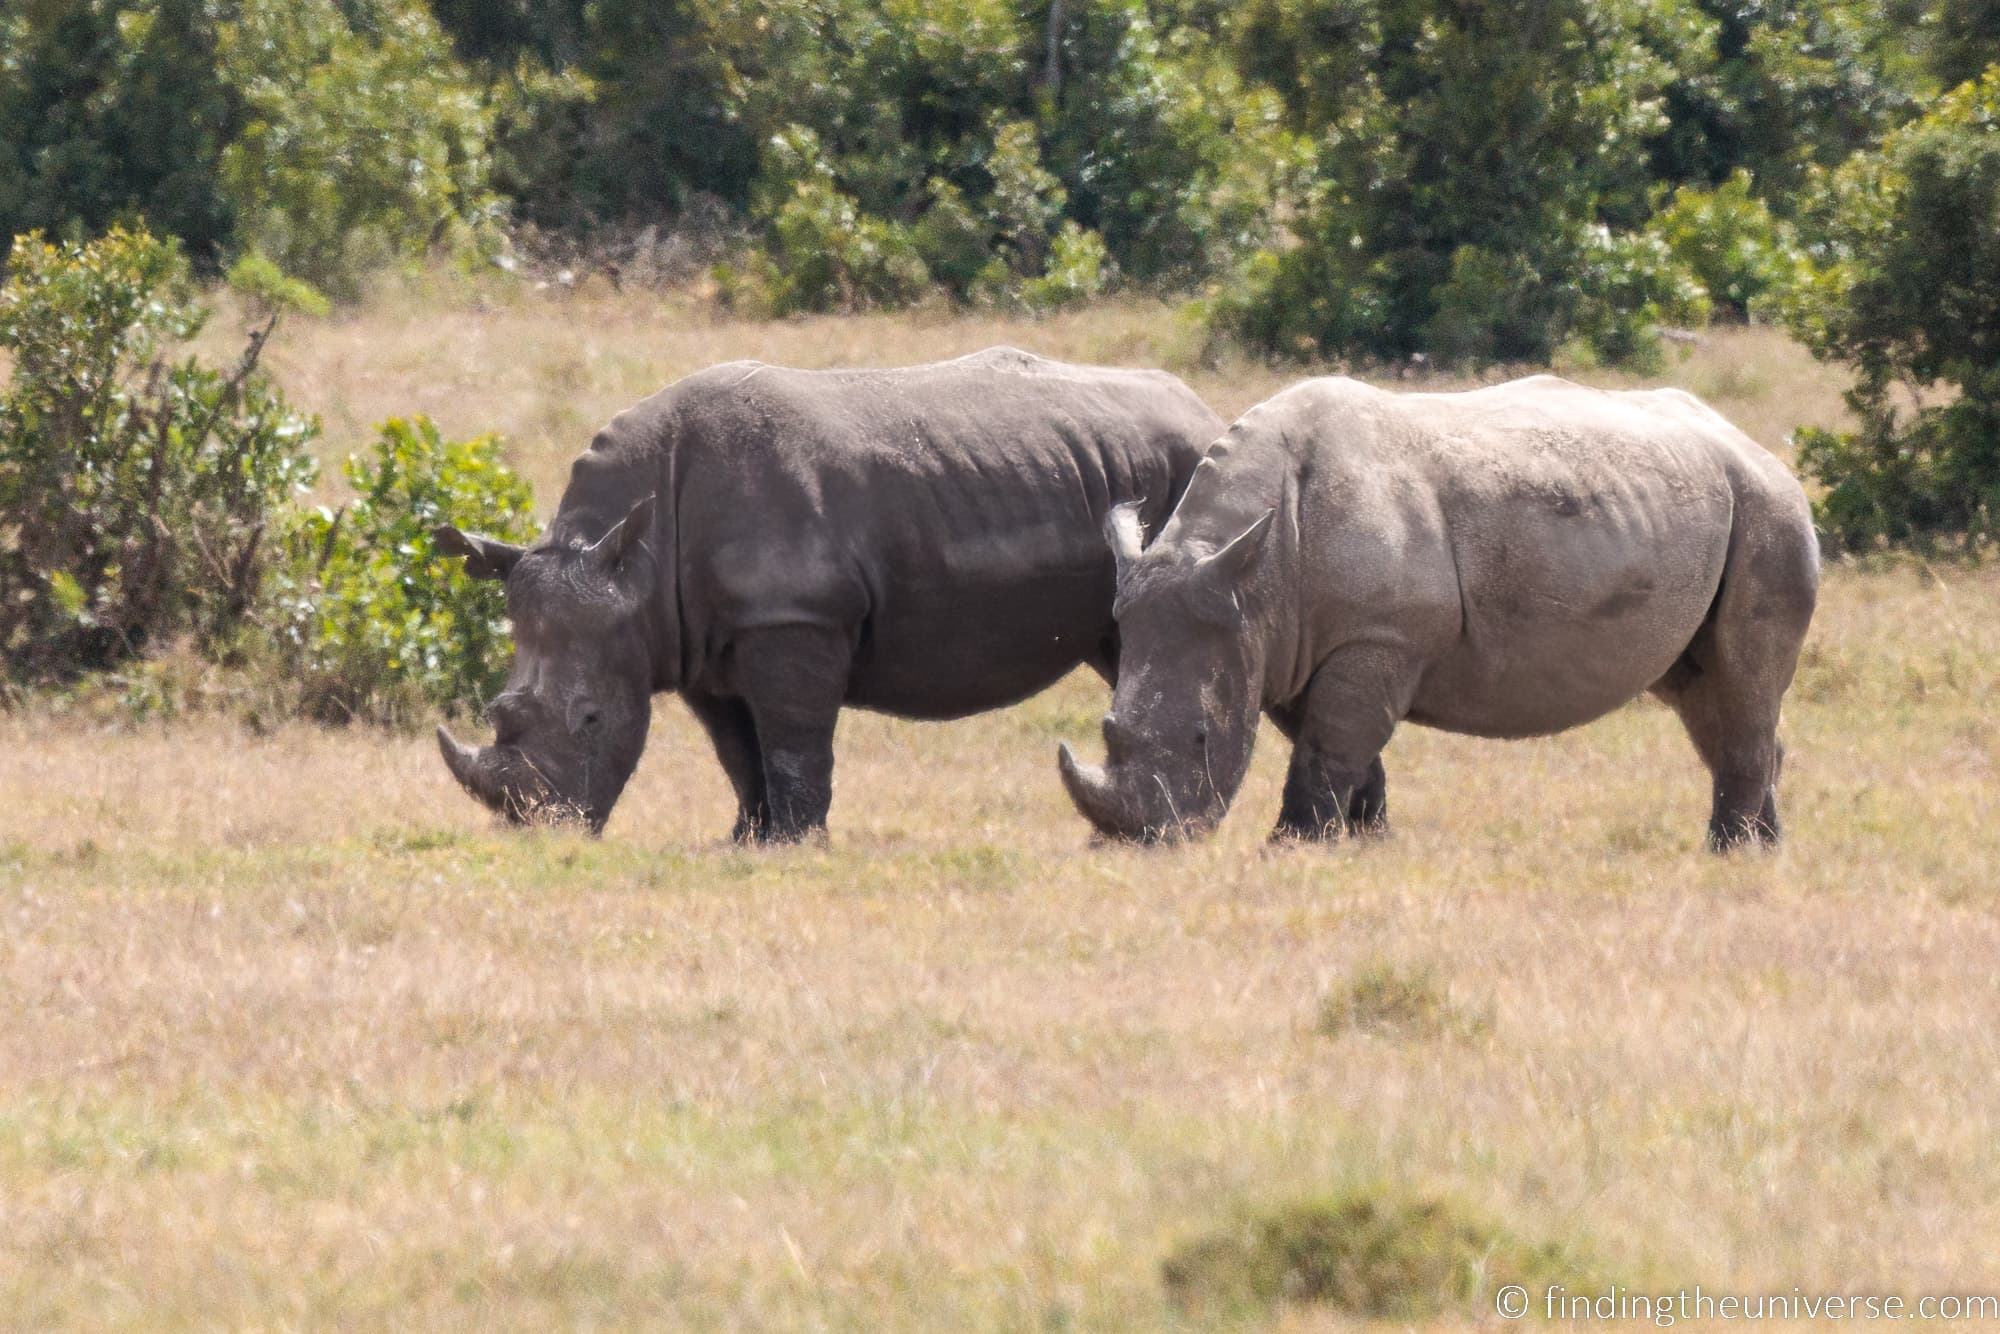
As you can see the rhinos are significantly sharper in the second version of the image.
The software is available as a free trial, so you can test it out with your images to see if they are improved before investing.
Topaz also makes a product called Topaz Photo AI. This includes a number of useful features as well as sharpening, including upscaling and noise reduction. It’s also available as a free trial. So if you want more features, this is worth checking out too.
Traditional photo editing applications like Lightroom have some sharpening features as well, however in my experience they are not as good as the Topaz software for specific fixes like sharpening or noise reduction.
Further Reading
That’s it for my guide to heat haze in photography! If you found this useful, you might enjoy some of my other photography related content. Here are some articles to get you started.
- I have a guide to my favorite photo editing applications, as well as the best alternatives to Lightroom
- I have a guide to the best noise reduction software for some ideas on how to get the best out of your photos even when they might be a bit noisy
- We have a guide to how to use a compact camera, how to use a DSLR camera, and how to use a mirrorless camera. We also have a guide to how a DSLR works
- Knowing how to compose a great photo is a key photography skill. See our guide to composition in photography for lots of tips on this subject
- We have a guide to what depth of field is and when you would want to use it.
- We are big fans of getting the most out of your digital photo files, and do to that you will need to shoot in RAW. See our guide to RAW in photography to understand what RAW is, and why you should switch to RAW as soon as you can if your camera supports it.
- You’re going to need something to run your photo editing software on. See our guide to the best laptops for photo editing for some tips on what to look for.
- If you’re looking for more advice on specific tips for different scenarios, we also have you covered. See our guide to Northern Lights photography, long exposure photography, fireworks photography, tips for taking photos of stars, and cold weather photography.
- Color accuracy is important for photography – see our guide to monitor calibration to ensure your screen is set up correctly.
- If you’re looking for a great gift for a photography loving friend or family member (or yourself!), take a look at our photography gift guide,
- If you’re in the market for a new camera, we have a detailed guide to the best travel cameras, as well as specific guides for the best cameras for hiking and backpacking, the best compact camera, best bridge camera, best mirrorless camera and best DSLR camera. We also have a guide to the best camera lenses.
- If you want a camera or lens, but the prices are a bit high, see our guide to where to buy used cameras and camera gear for some budget savings options.
- We have a guide to why you need a tripod, a guide to choosing a travel tripod, and a round-up of our favourite travel tripods
Looking to Improve Your Photography?
If you found this post helpful, and you want to improve your photography overall, you might want to check out my online travel photography course.
Since launching the course in 2016, I’ve already helped over 2,000 students learn how to take better photos. The course covers pretty much everything you need to know, from the basics of how a camera works, through to composition, light, and photo editing.
It also covers more advanced topics, including astrophotography, long exposure photography, flash photography, and HDR photography.
You get feedback from me as you progress, access to webinars, interviews and videos, as well as exclusive membership of a Facebook group where you can get feedback on your work and take part in regular challenges.
It’s available for an amazing one-off price for lifetime access, and I think you should check it out. Which you can do by clicking here.
And that’s it! If you have any questions, I’m happy to answer them. Just pop them in the comments below and I’ll get back to you as soon as I can.
[ad_2]
Source link